 "BiTurbo228 - Dr Frankenstein of Spitfires" (biturbo228)
08/24/2018 at 12:15 • Filed to: Fix It Again Tony
 17
17
 19
19|
"BiTurbo228 - Dr Frankenstein of Spitfires" (biturbo228)
08/24/2018 at 12:15 • Filed to: Fix It Again Tony | 17
| 19 |
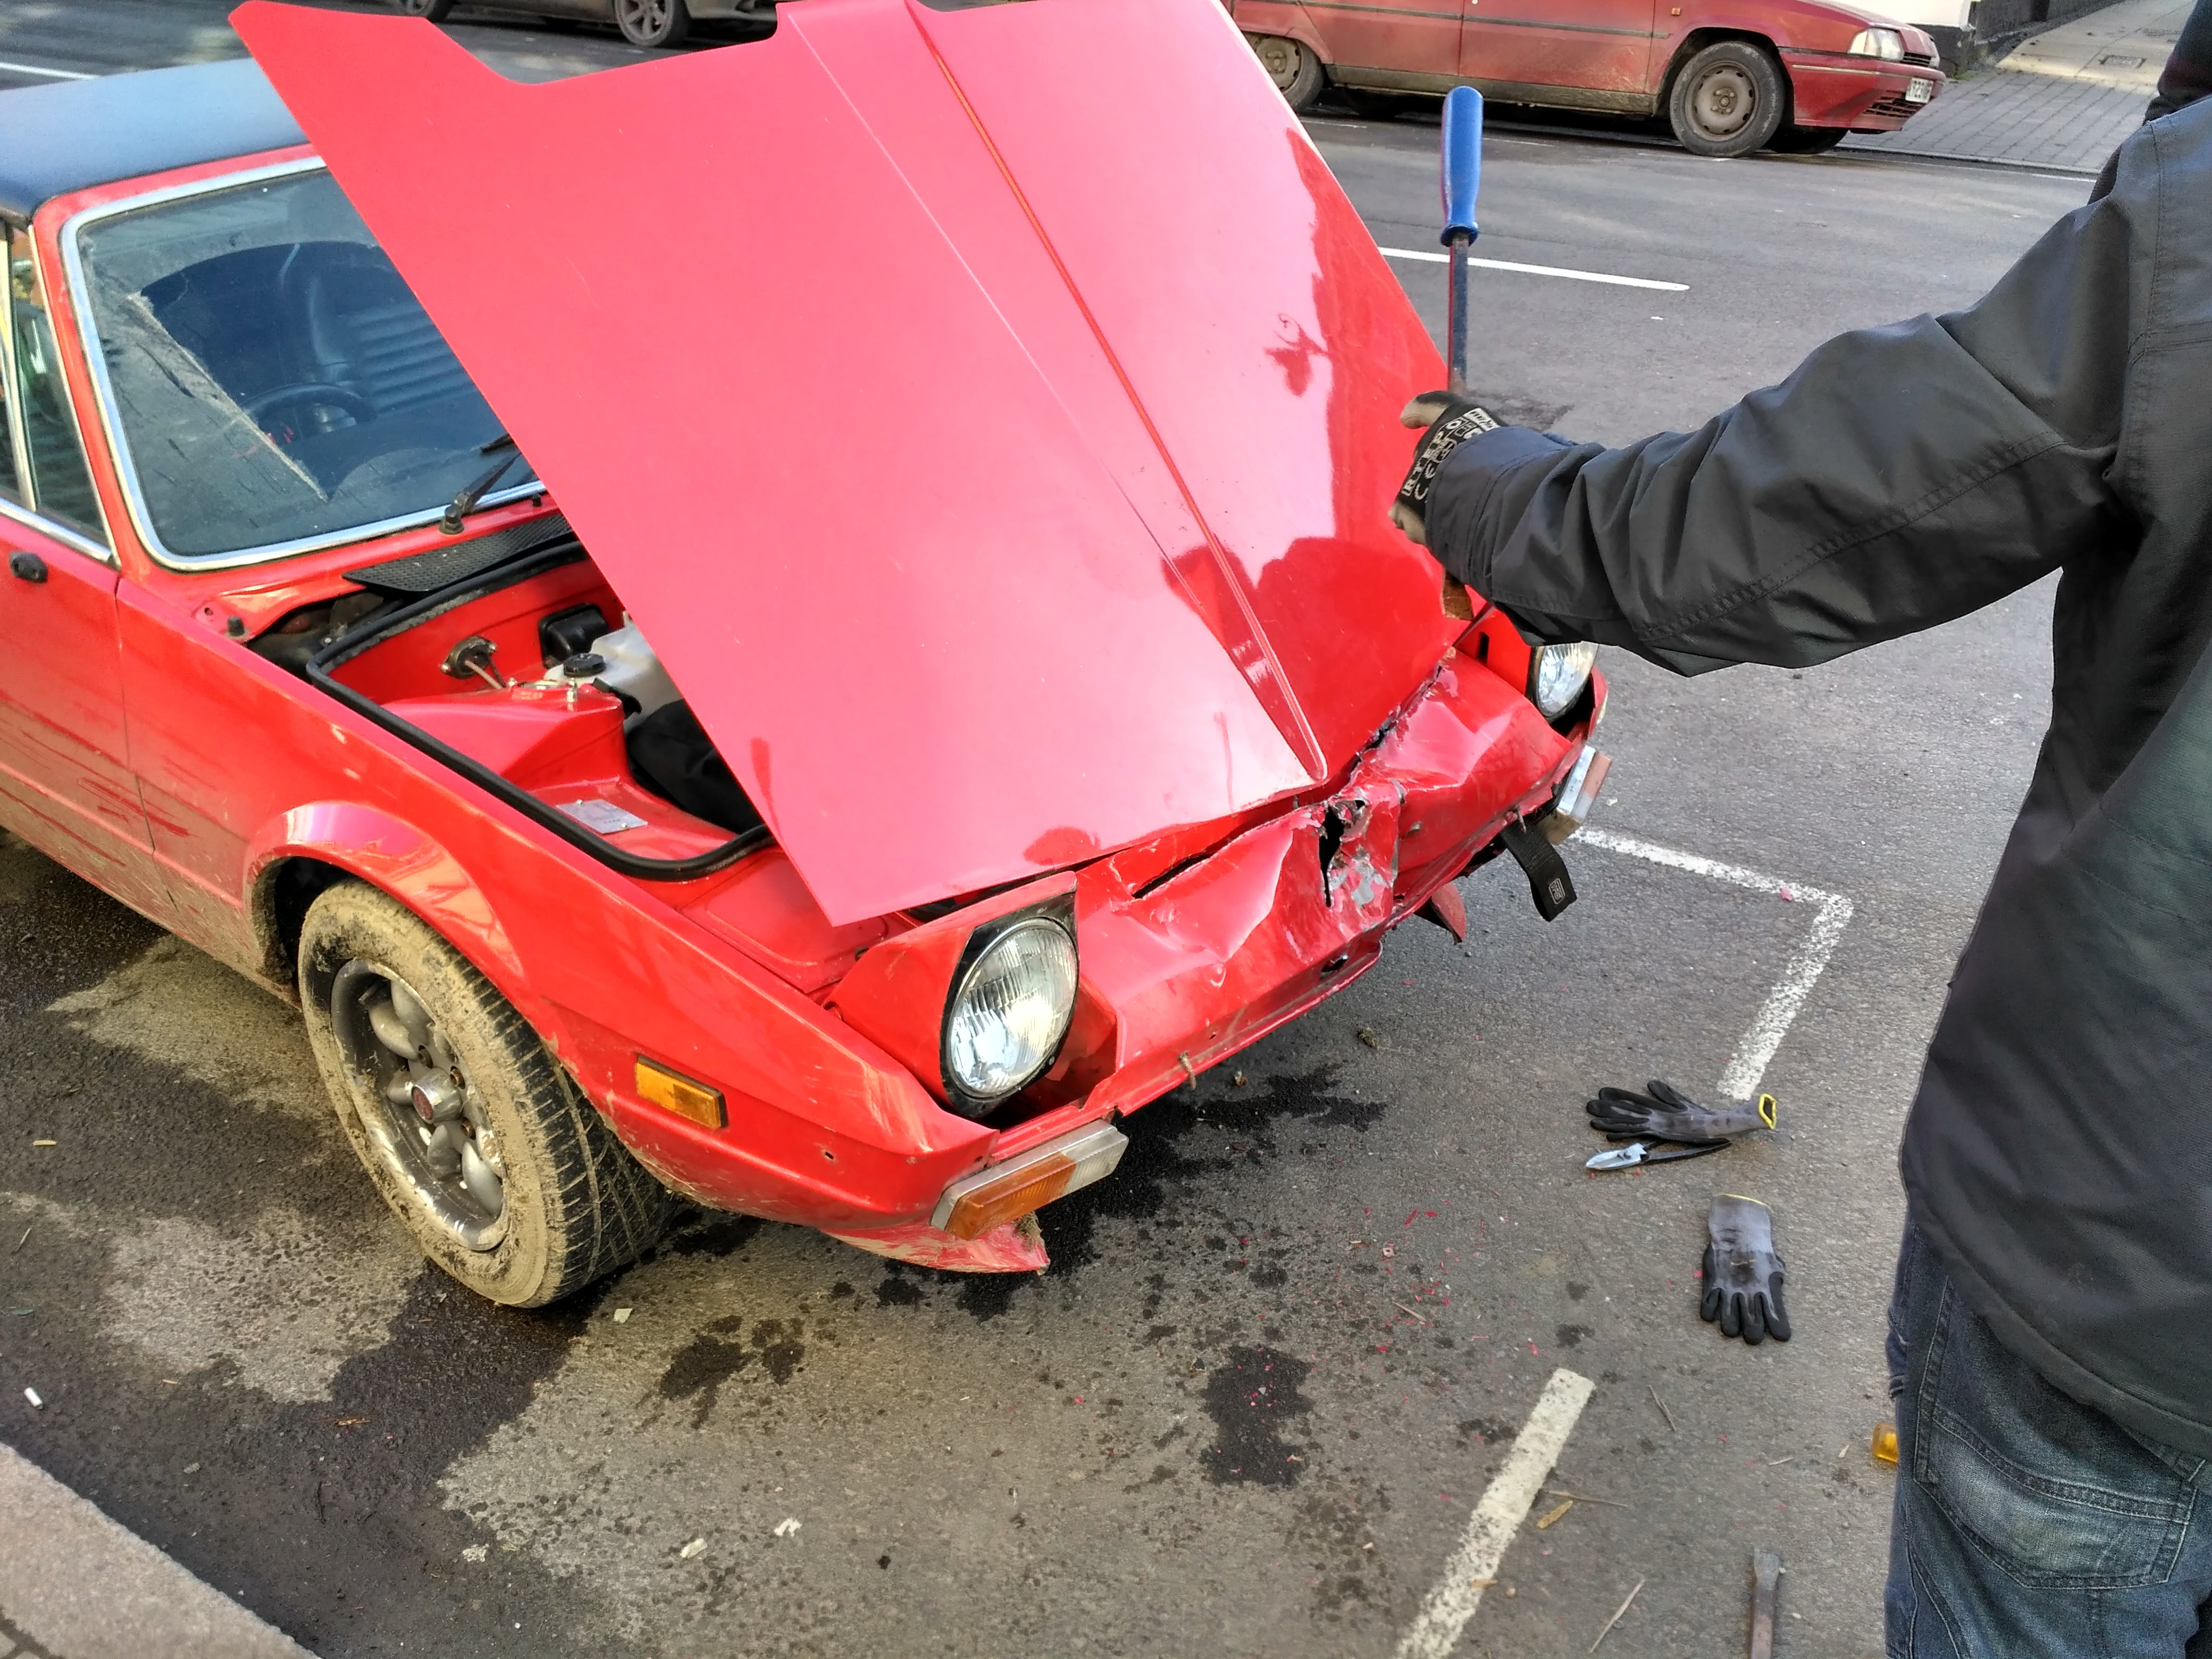
As you may have gathered if you’ve been reading along with my !!!error: Indecipherable SUB-paragraph formatting!!! , I may or may not have put my little X1/9 through a hedge. Not cool. Still, we can rebuild it! We have the technology :)
First thing’s first, a damage assessment:
Front end pretty thoroughly mashed in and cut up to get the bonnet open
Various dings all over the body
Left-hand tie rod bent to 45-degrees (fixed in Wales)
Couldn’t quite get the tracking right in Wales which suggests something else is bent
Front left wheel which took the brunt of the force seems to rock back and forth on the strut (the rod of the shock moves in relation to the body)
Radiator pushed back 4", but otherwise intact
Lower lip spoiler pulled off
Bumpers wrecked
Wing mirror left behind in the field
Fuel pump whining and not able to keep up with fuelling above 4000rpm towards the end of the trip
Next up, lets strip everything down ready for repair (exposing just how thoroughly wrecked the nose panel is).
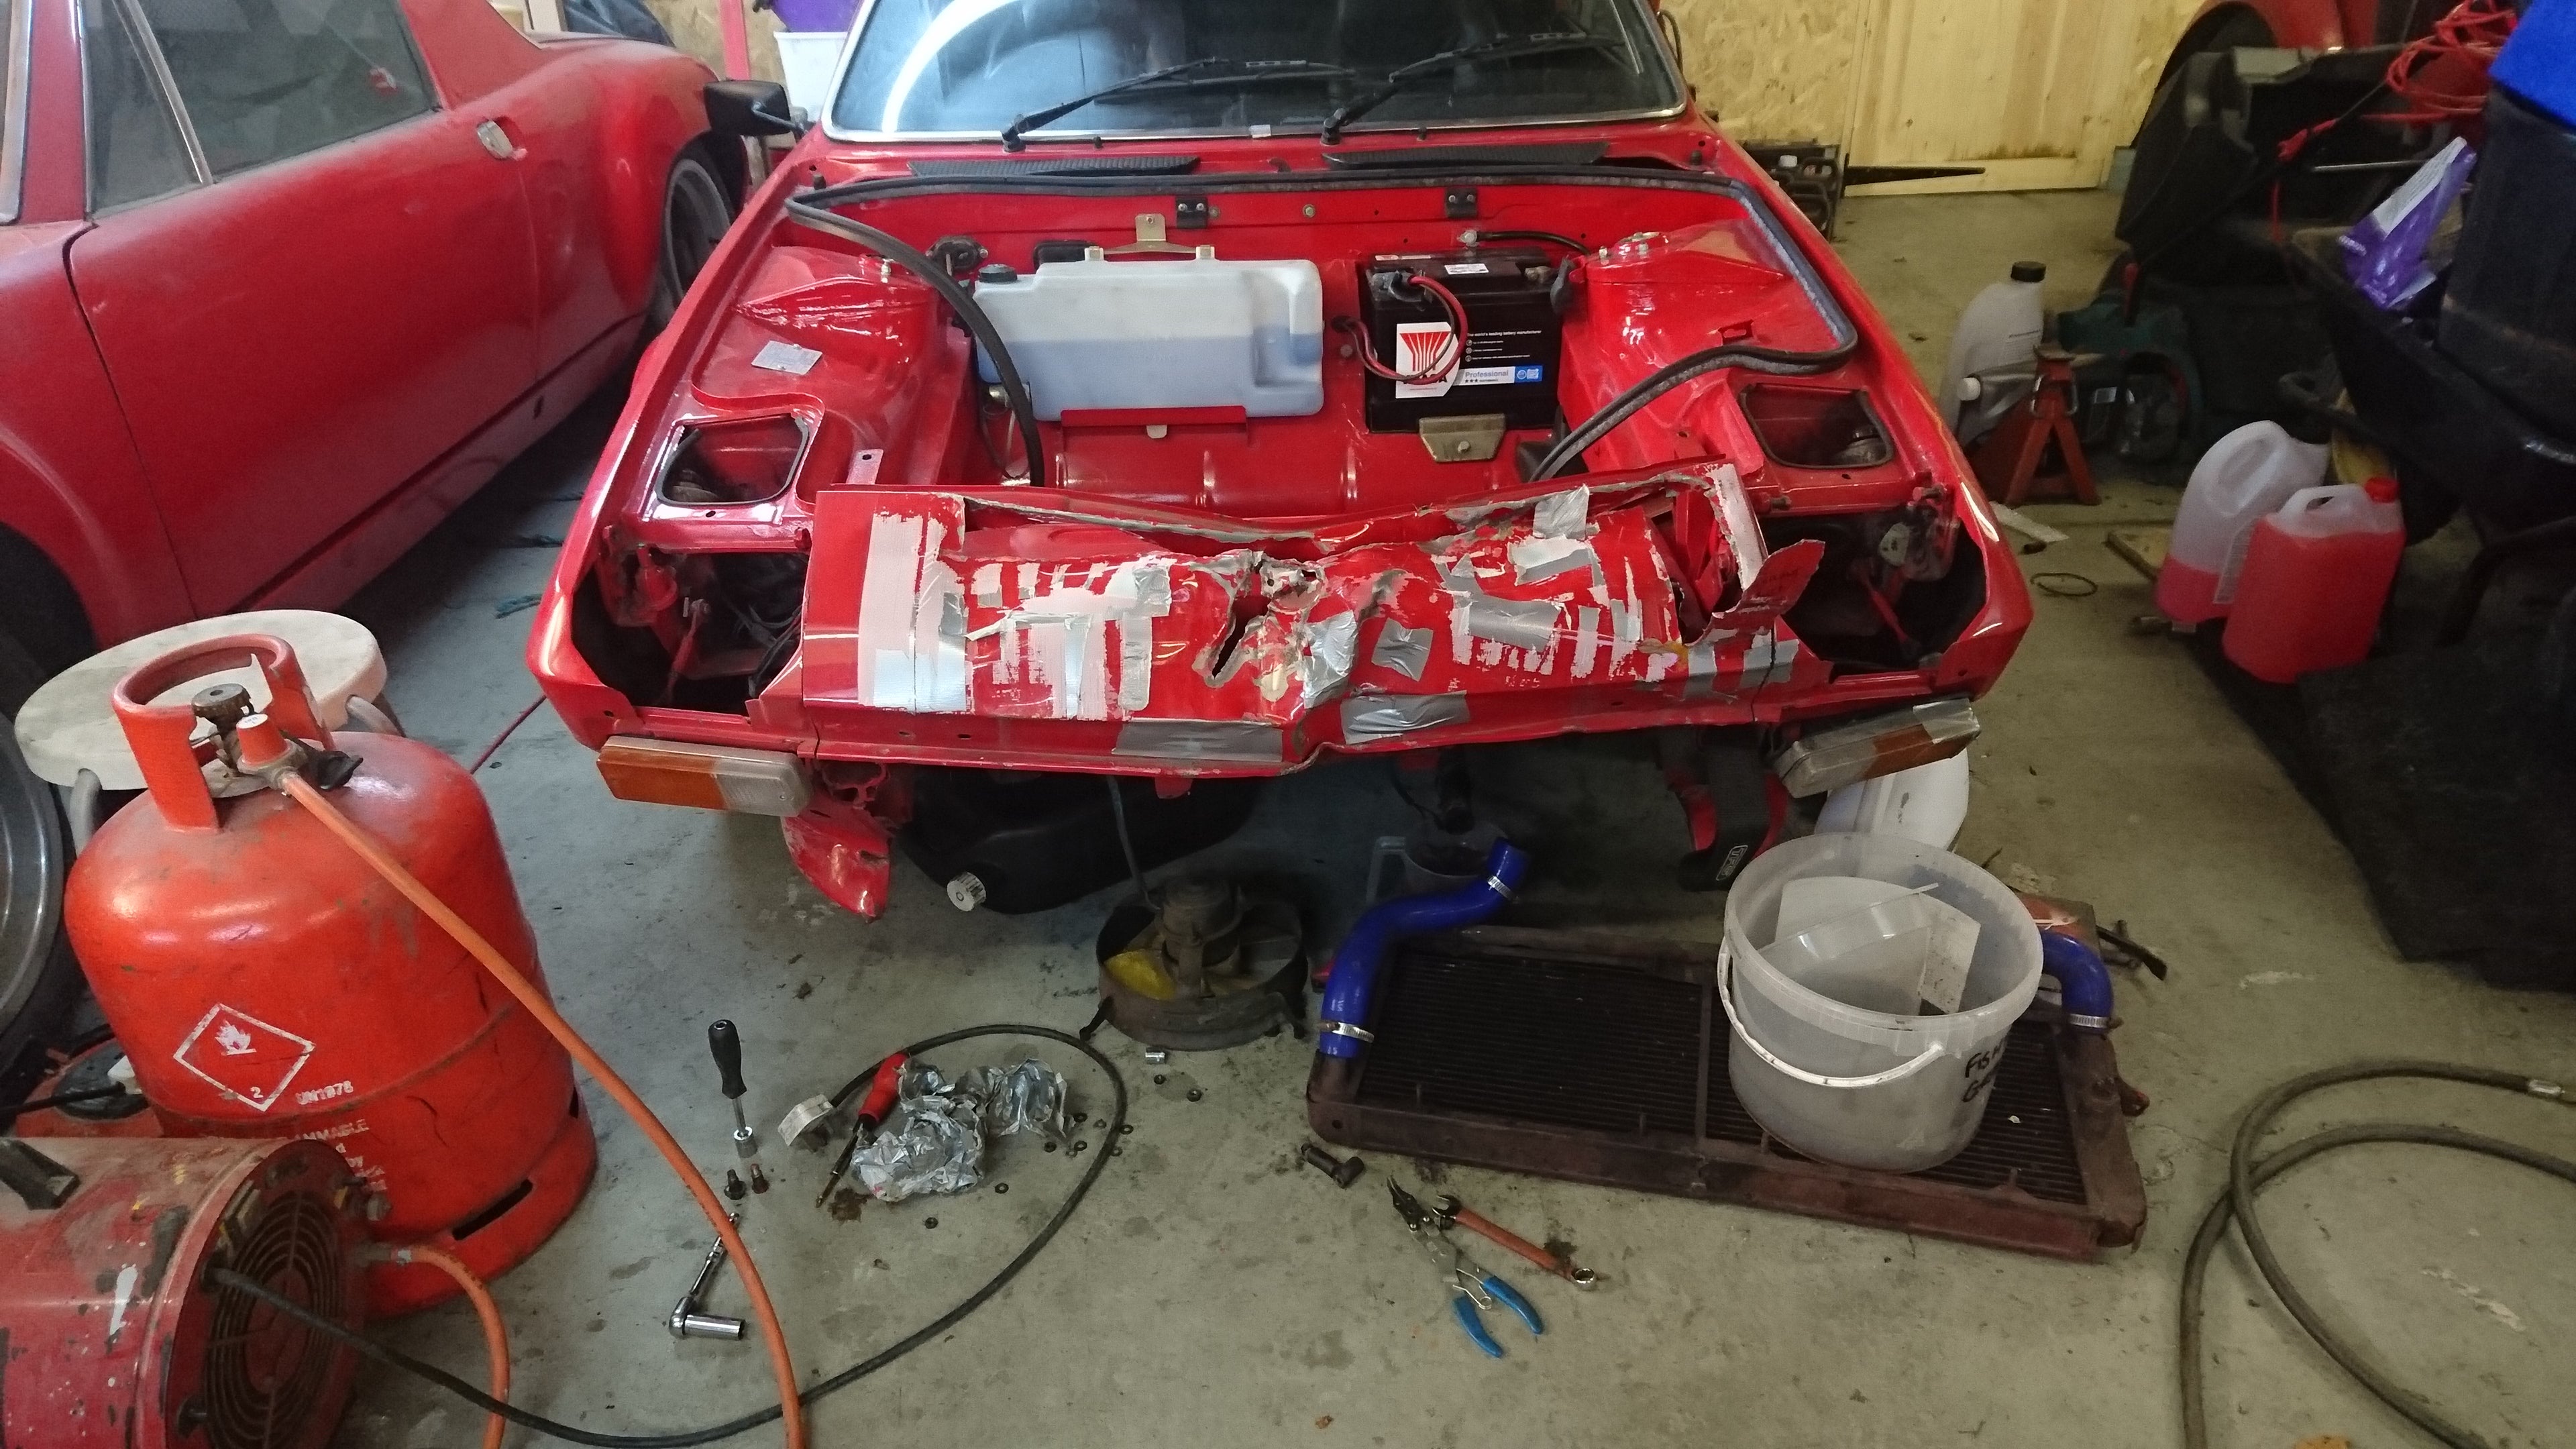
Not pretty...
Then removing all of the mangled metal and welding it back up . Had to cut a slit along the top of the bent section to pull it down and forwards into shape, and re-make the leading lip.
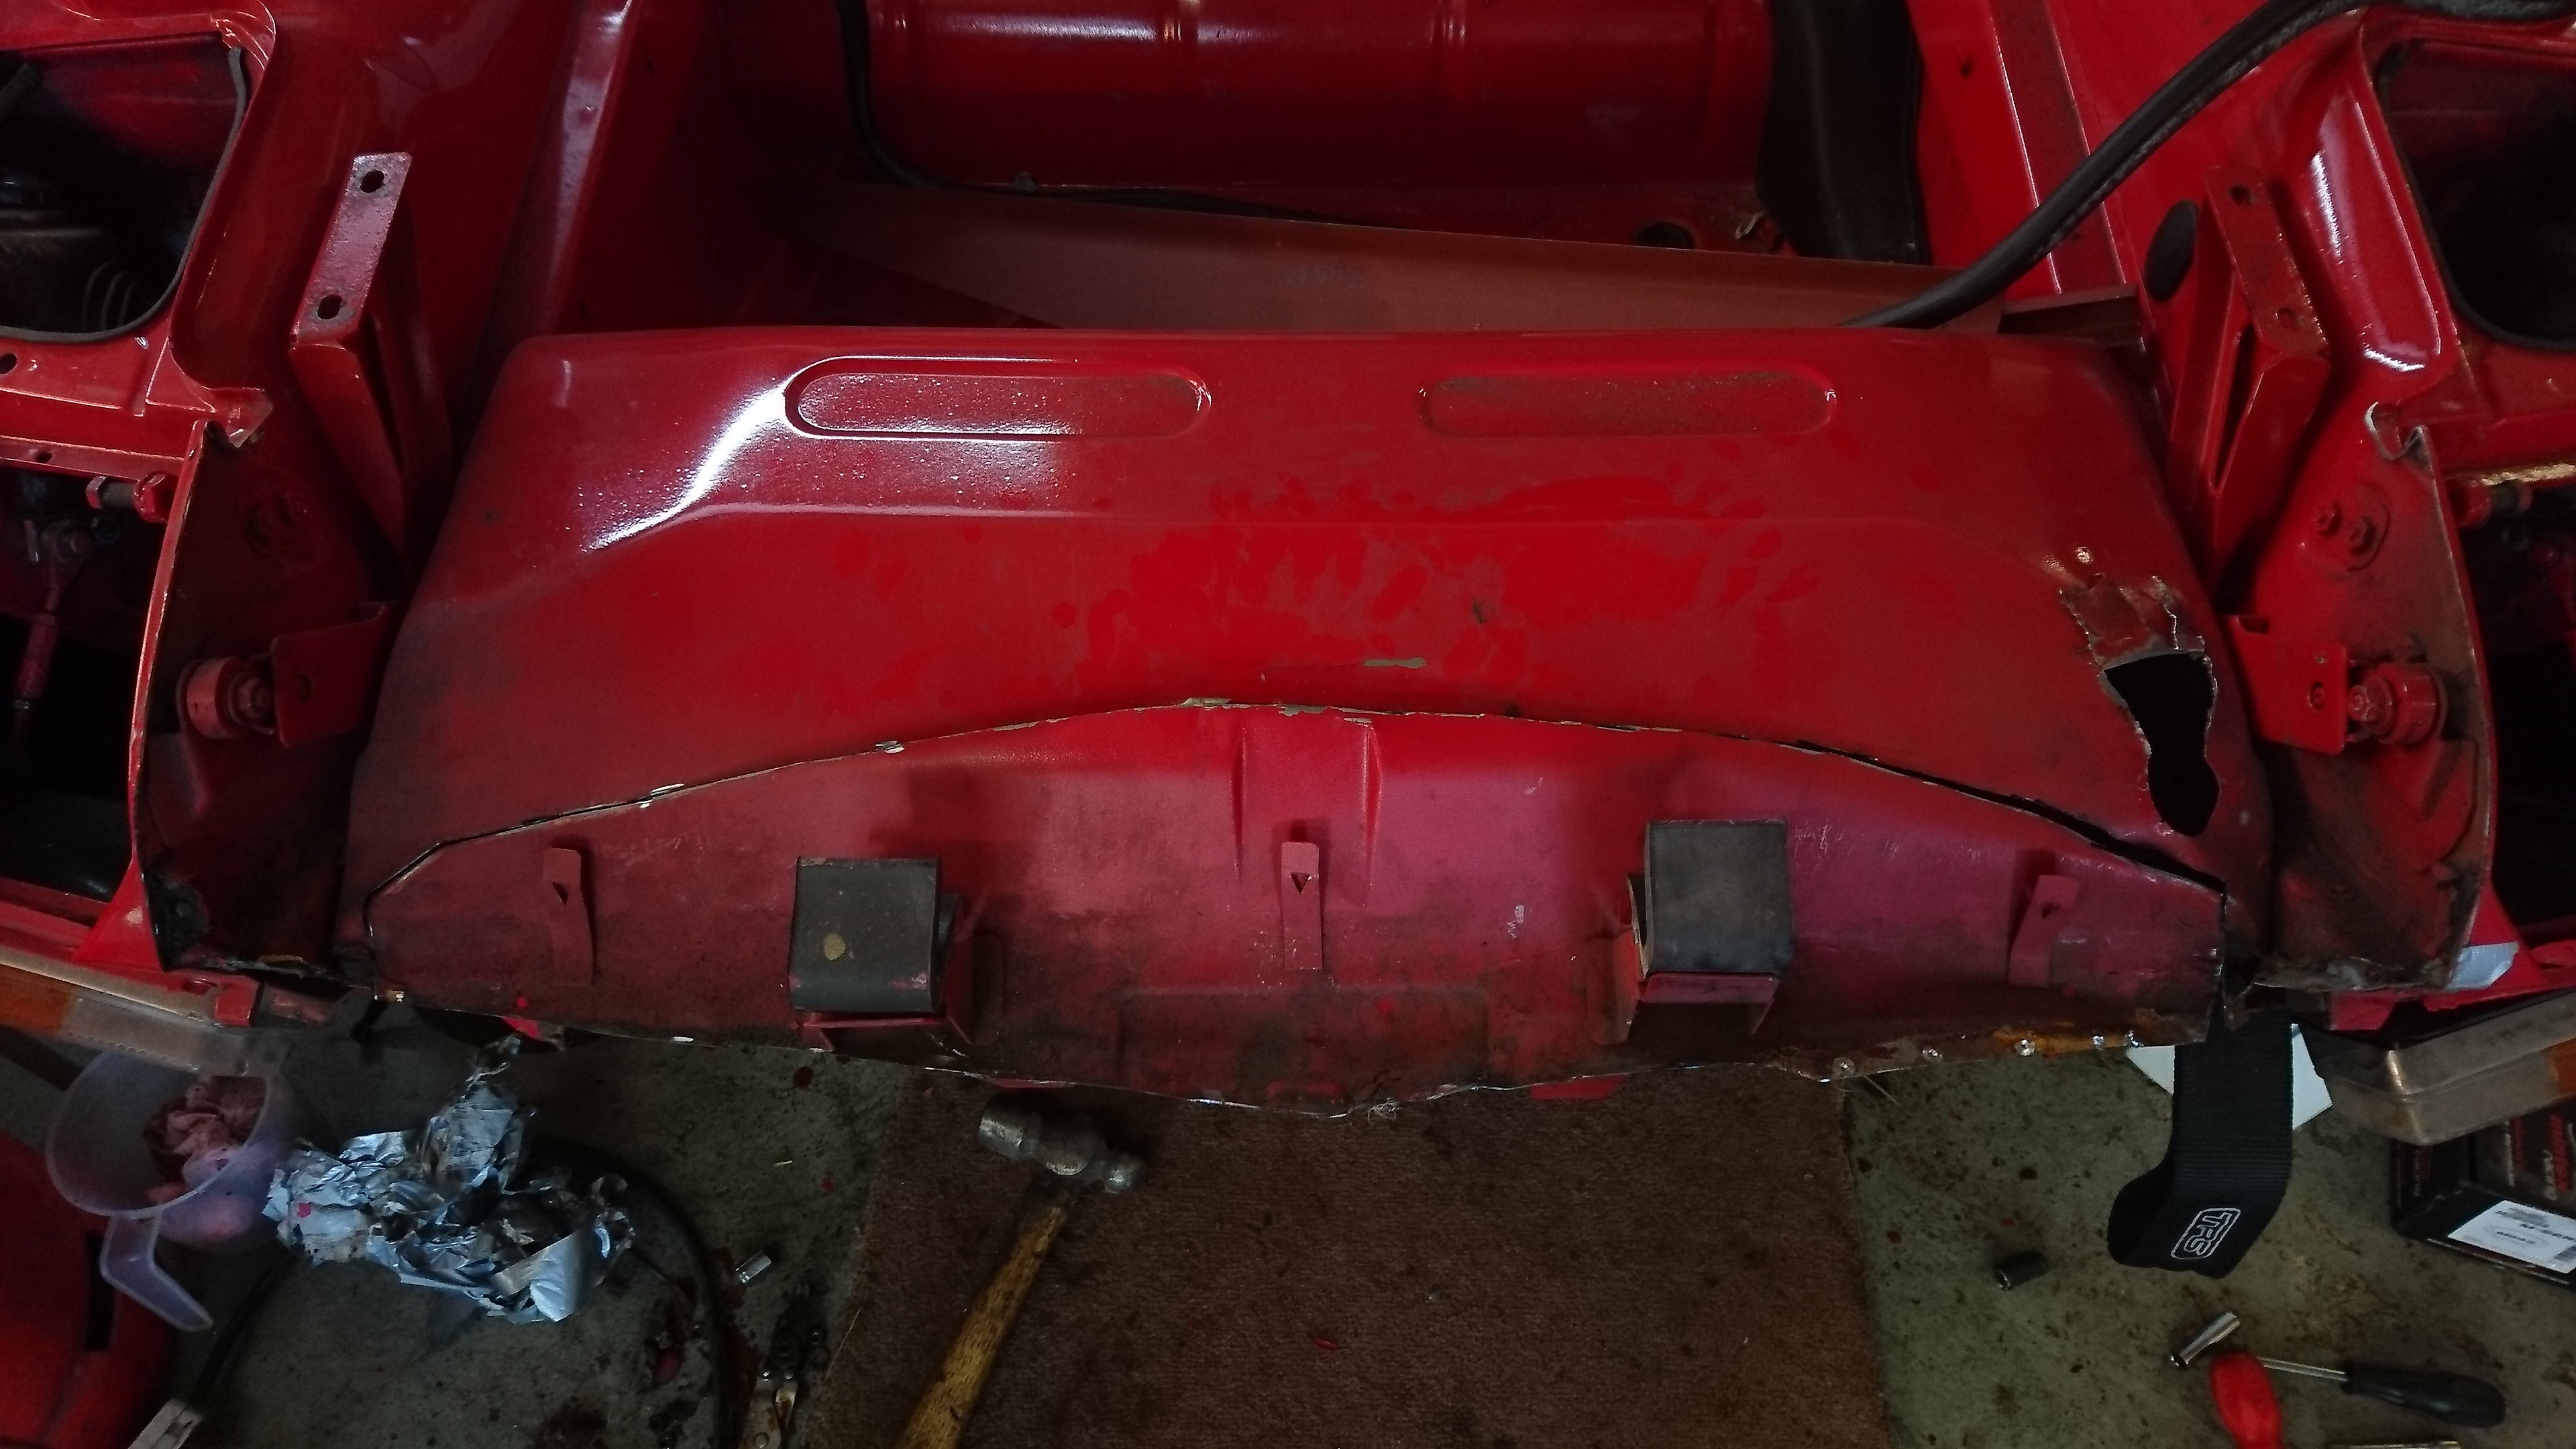
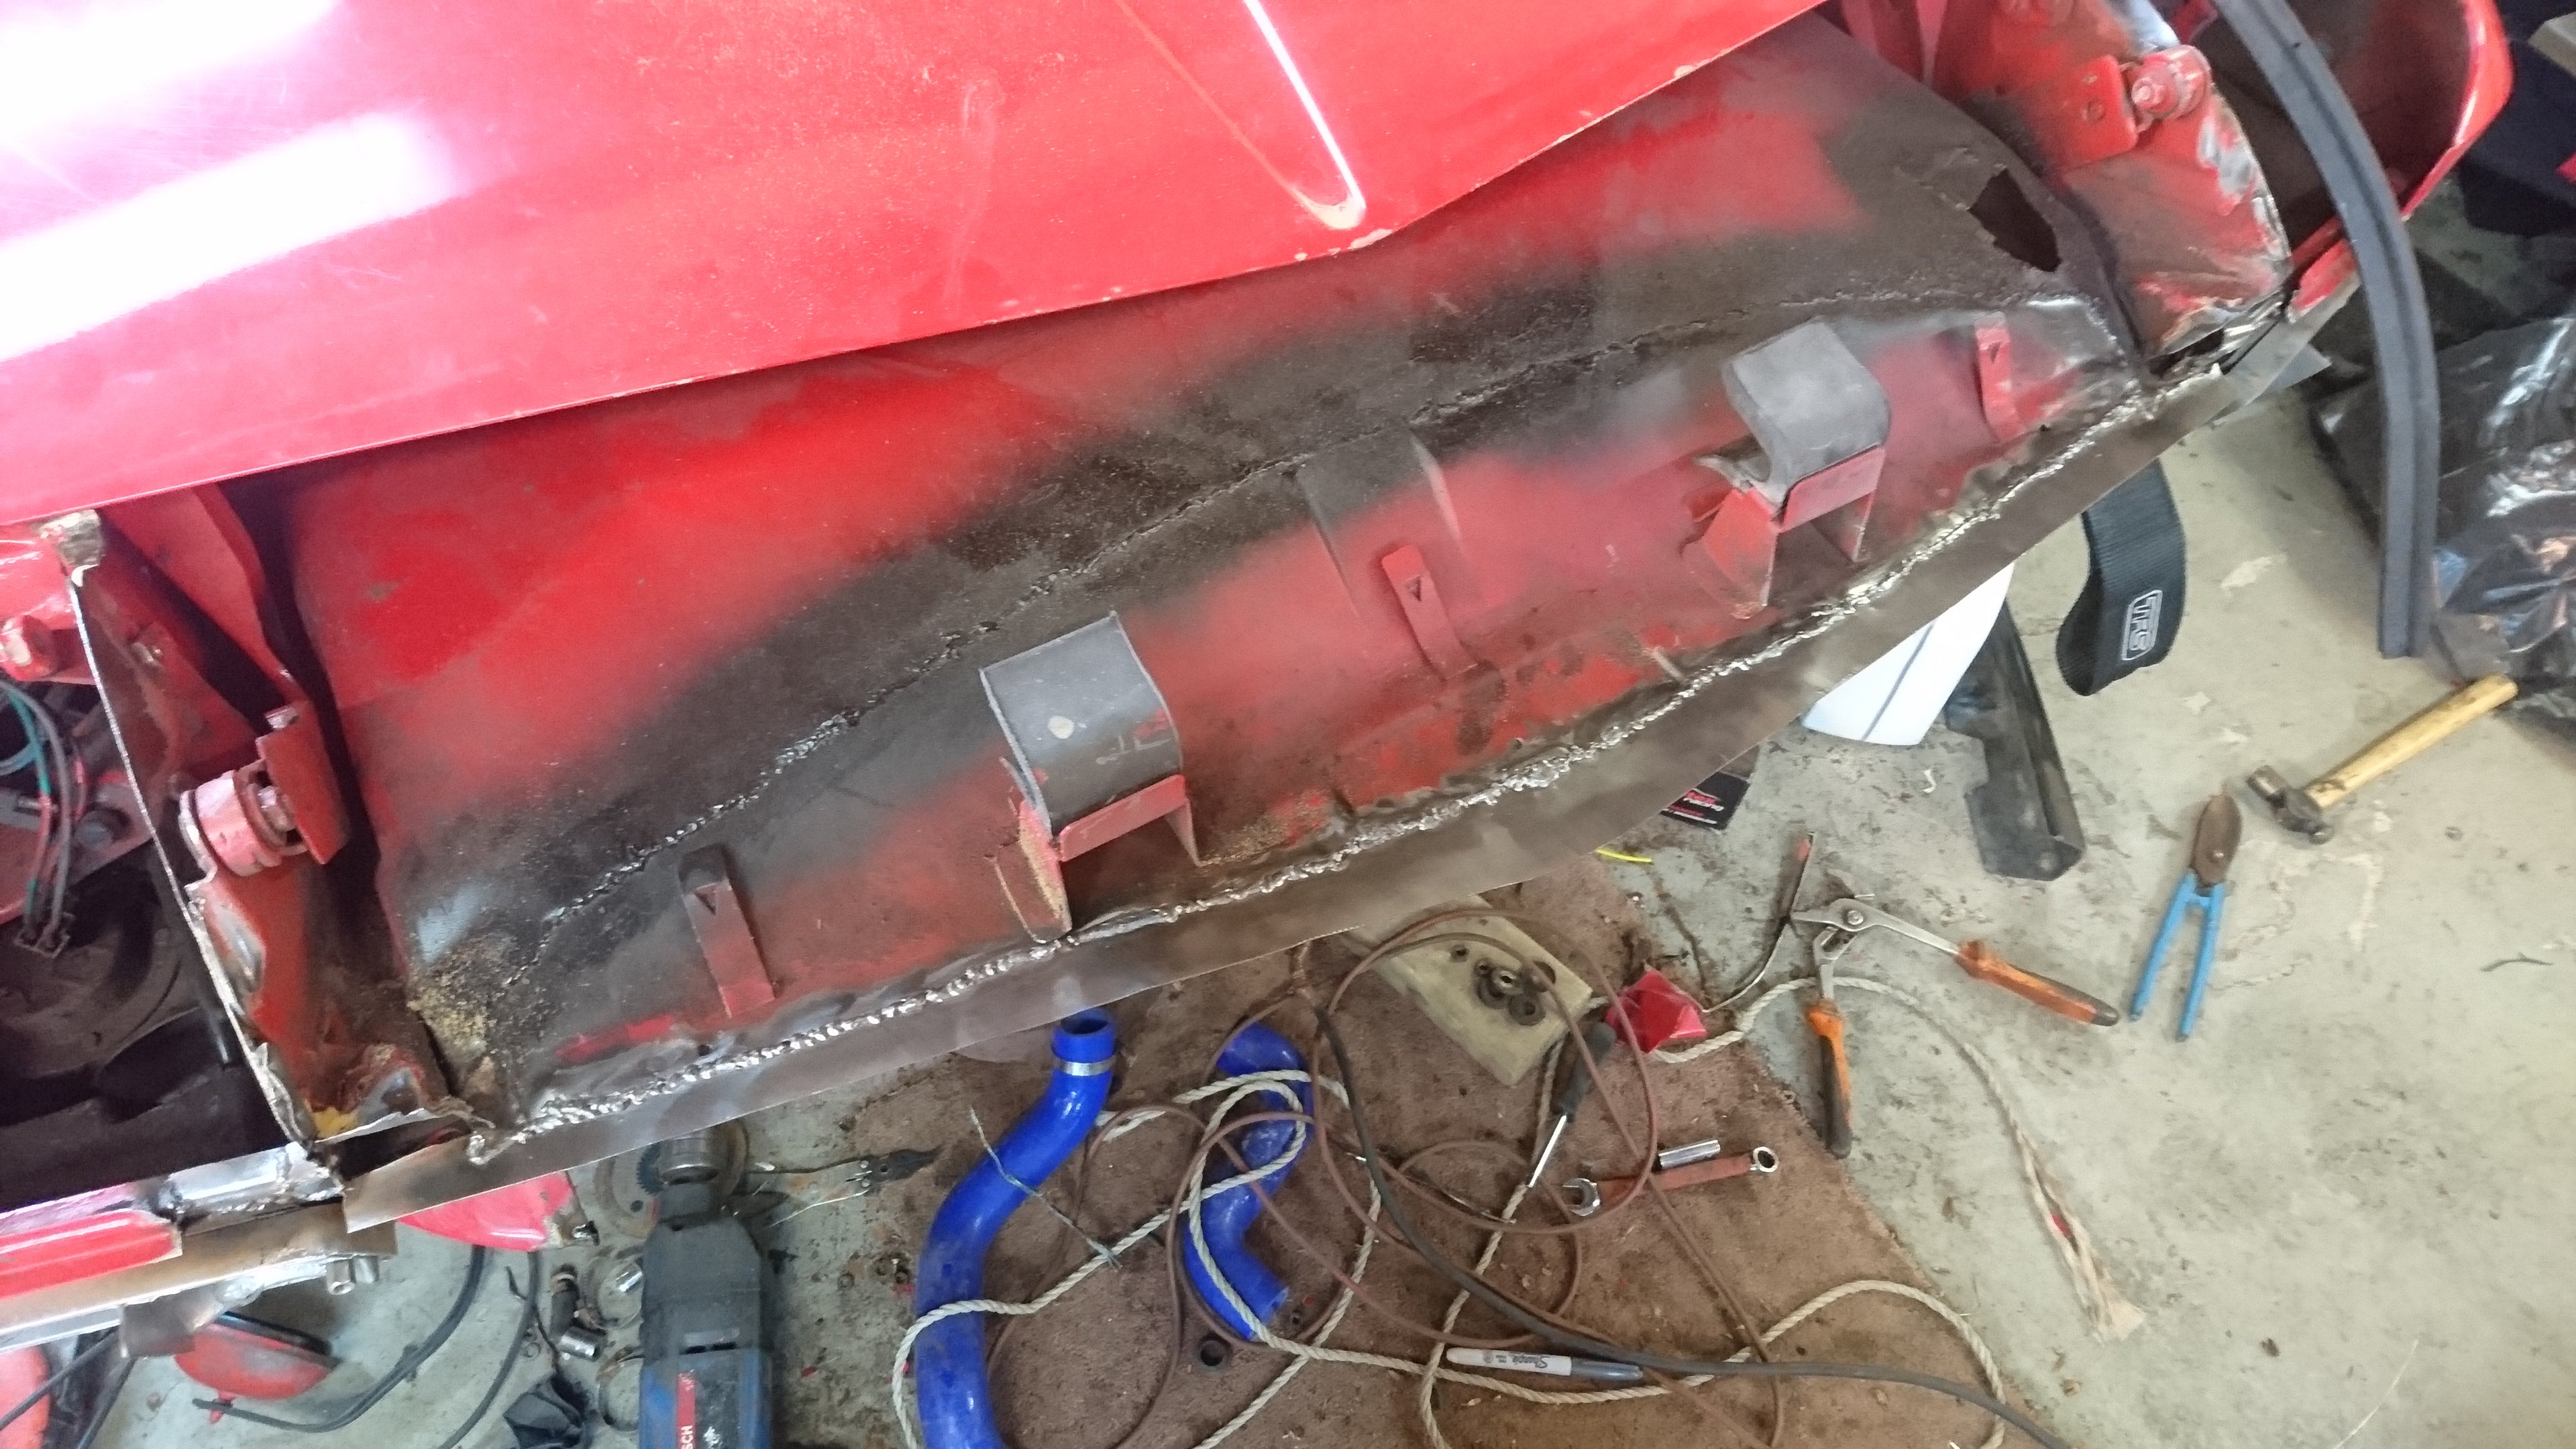
Apologies for the schizophrenic photo brightness. This was done over the course of a few days.
As a thankyou for borrowing the MG F, my mate bought me a fibreglass nosecone as you can’t really get steel ones anymore. Took a bit of fettling to get it into the right shape (slit down the middle and bent up slightly), but got there in the end.
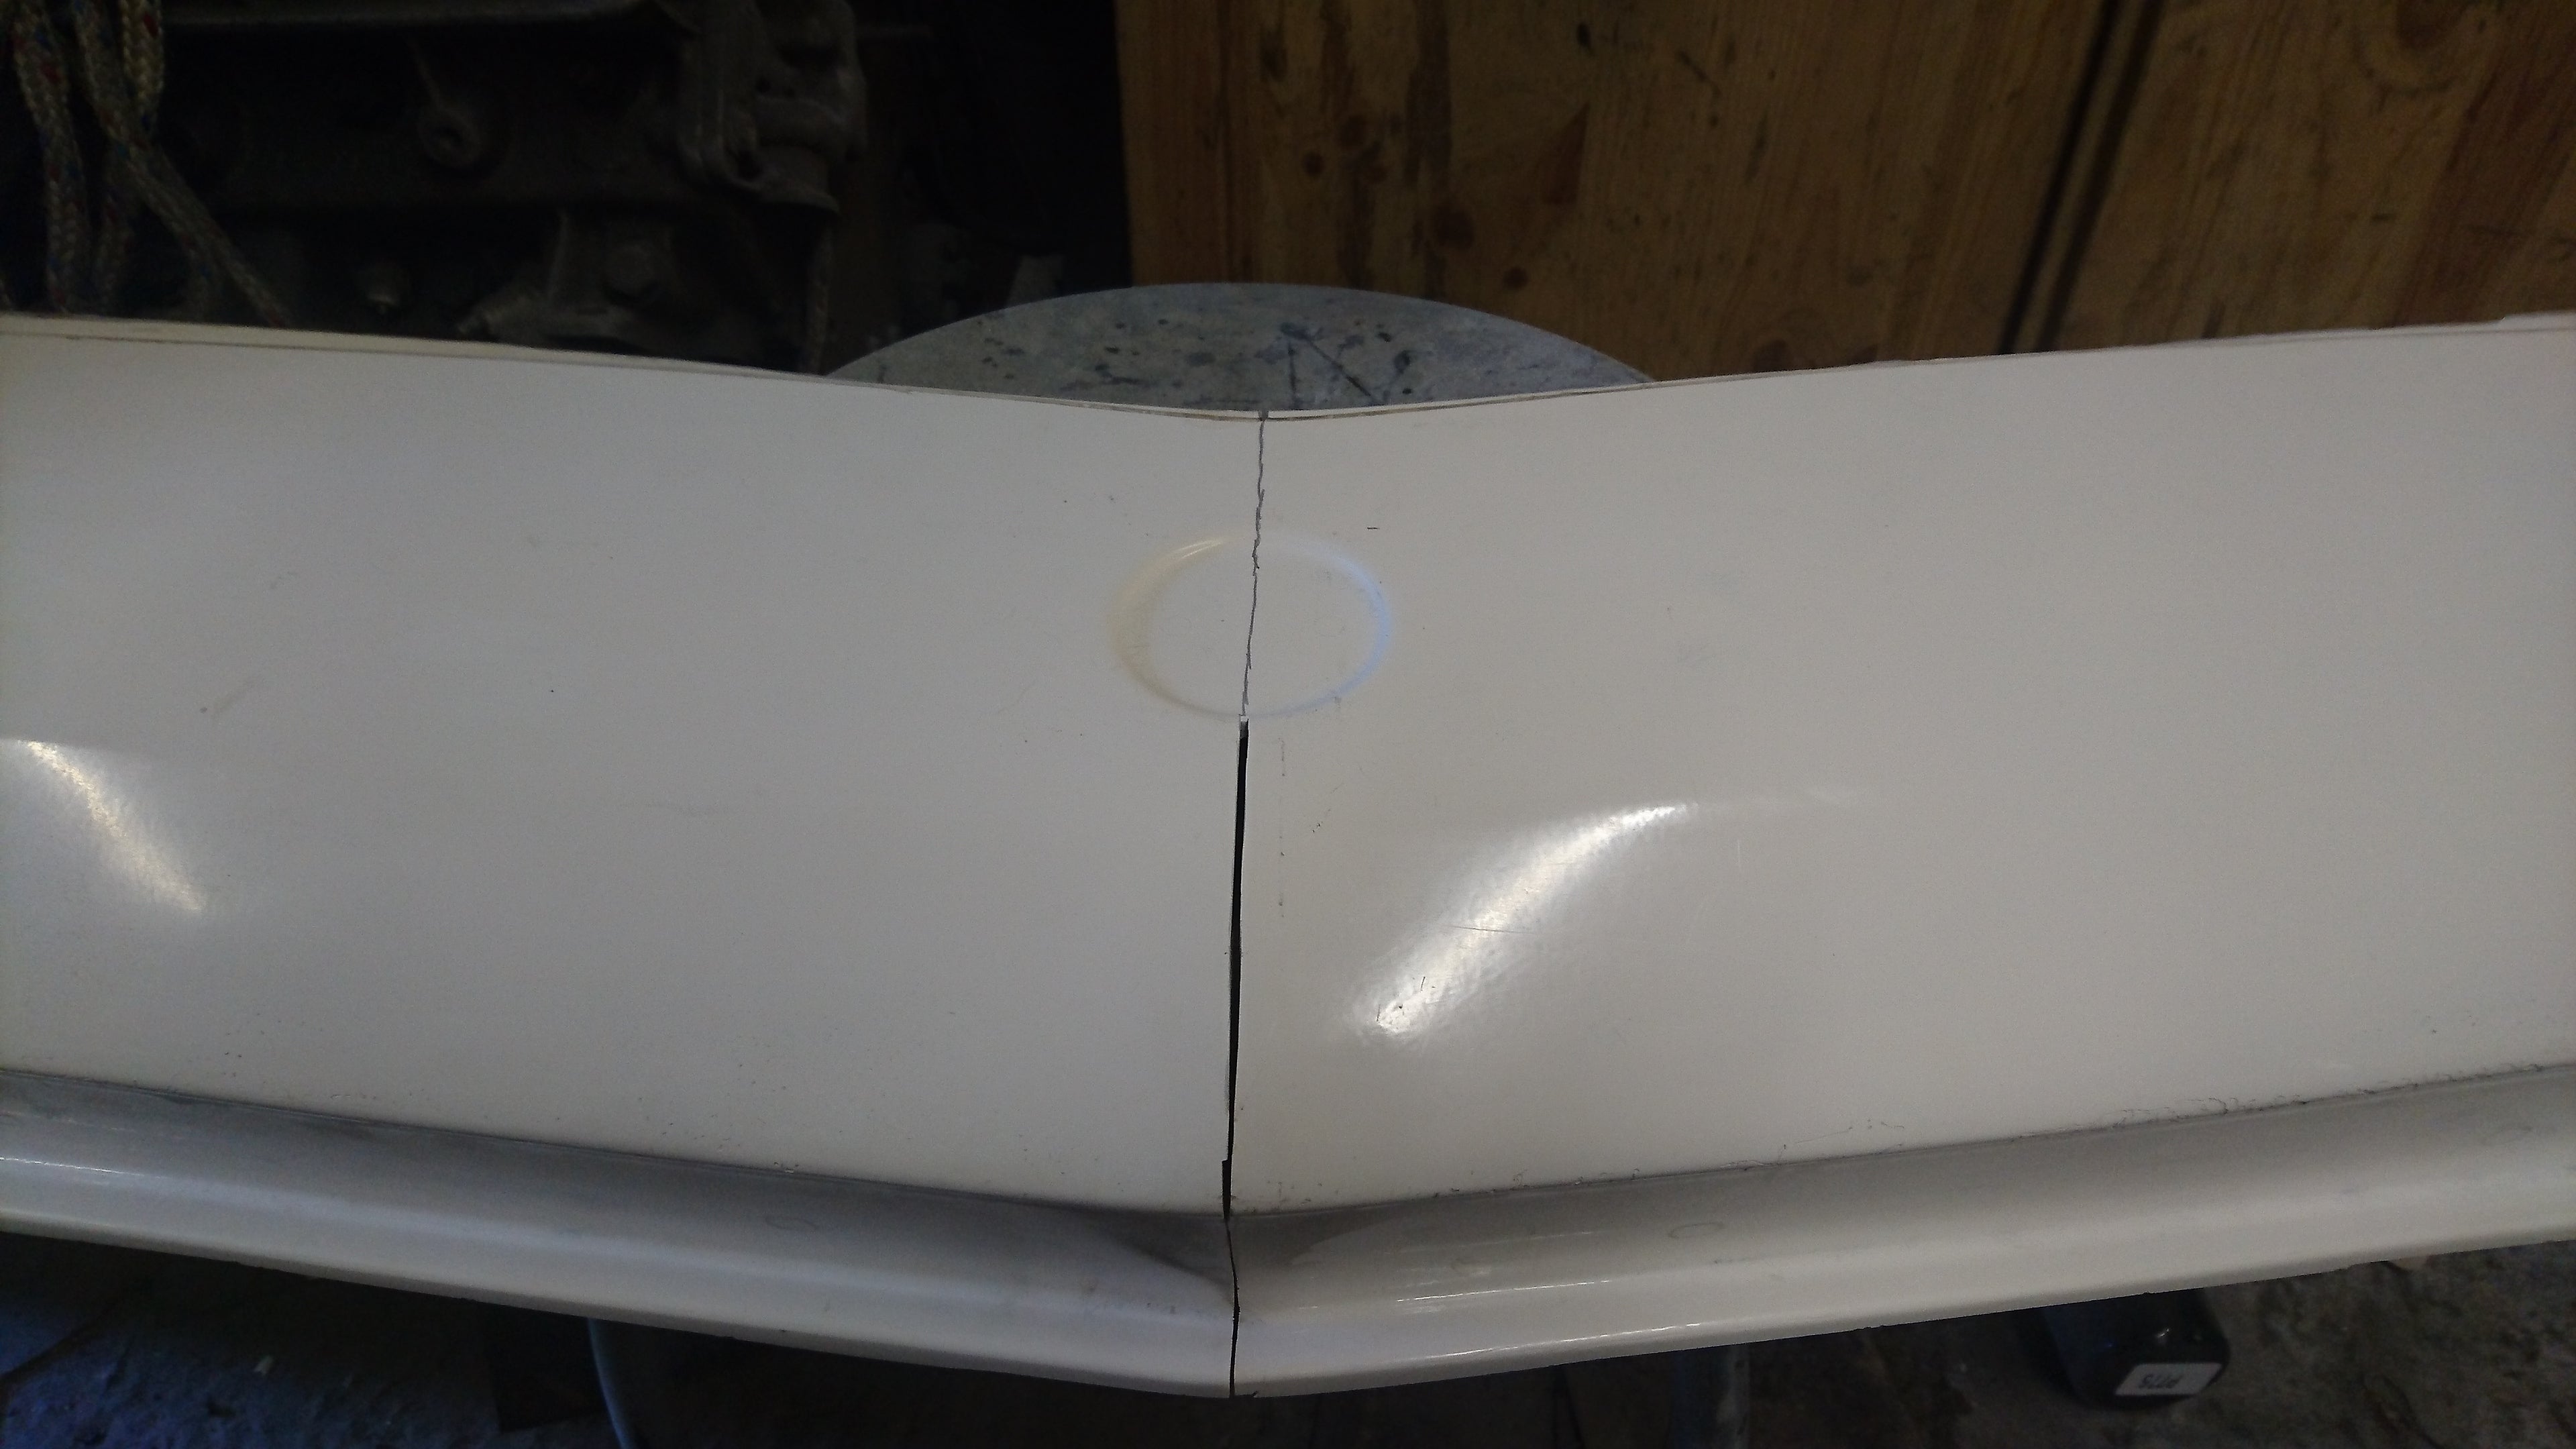
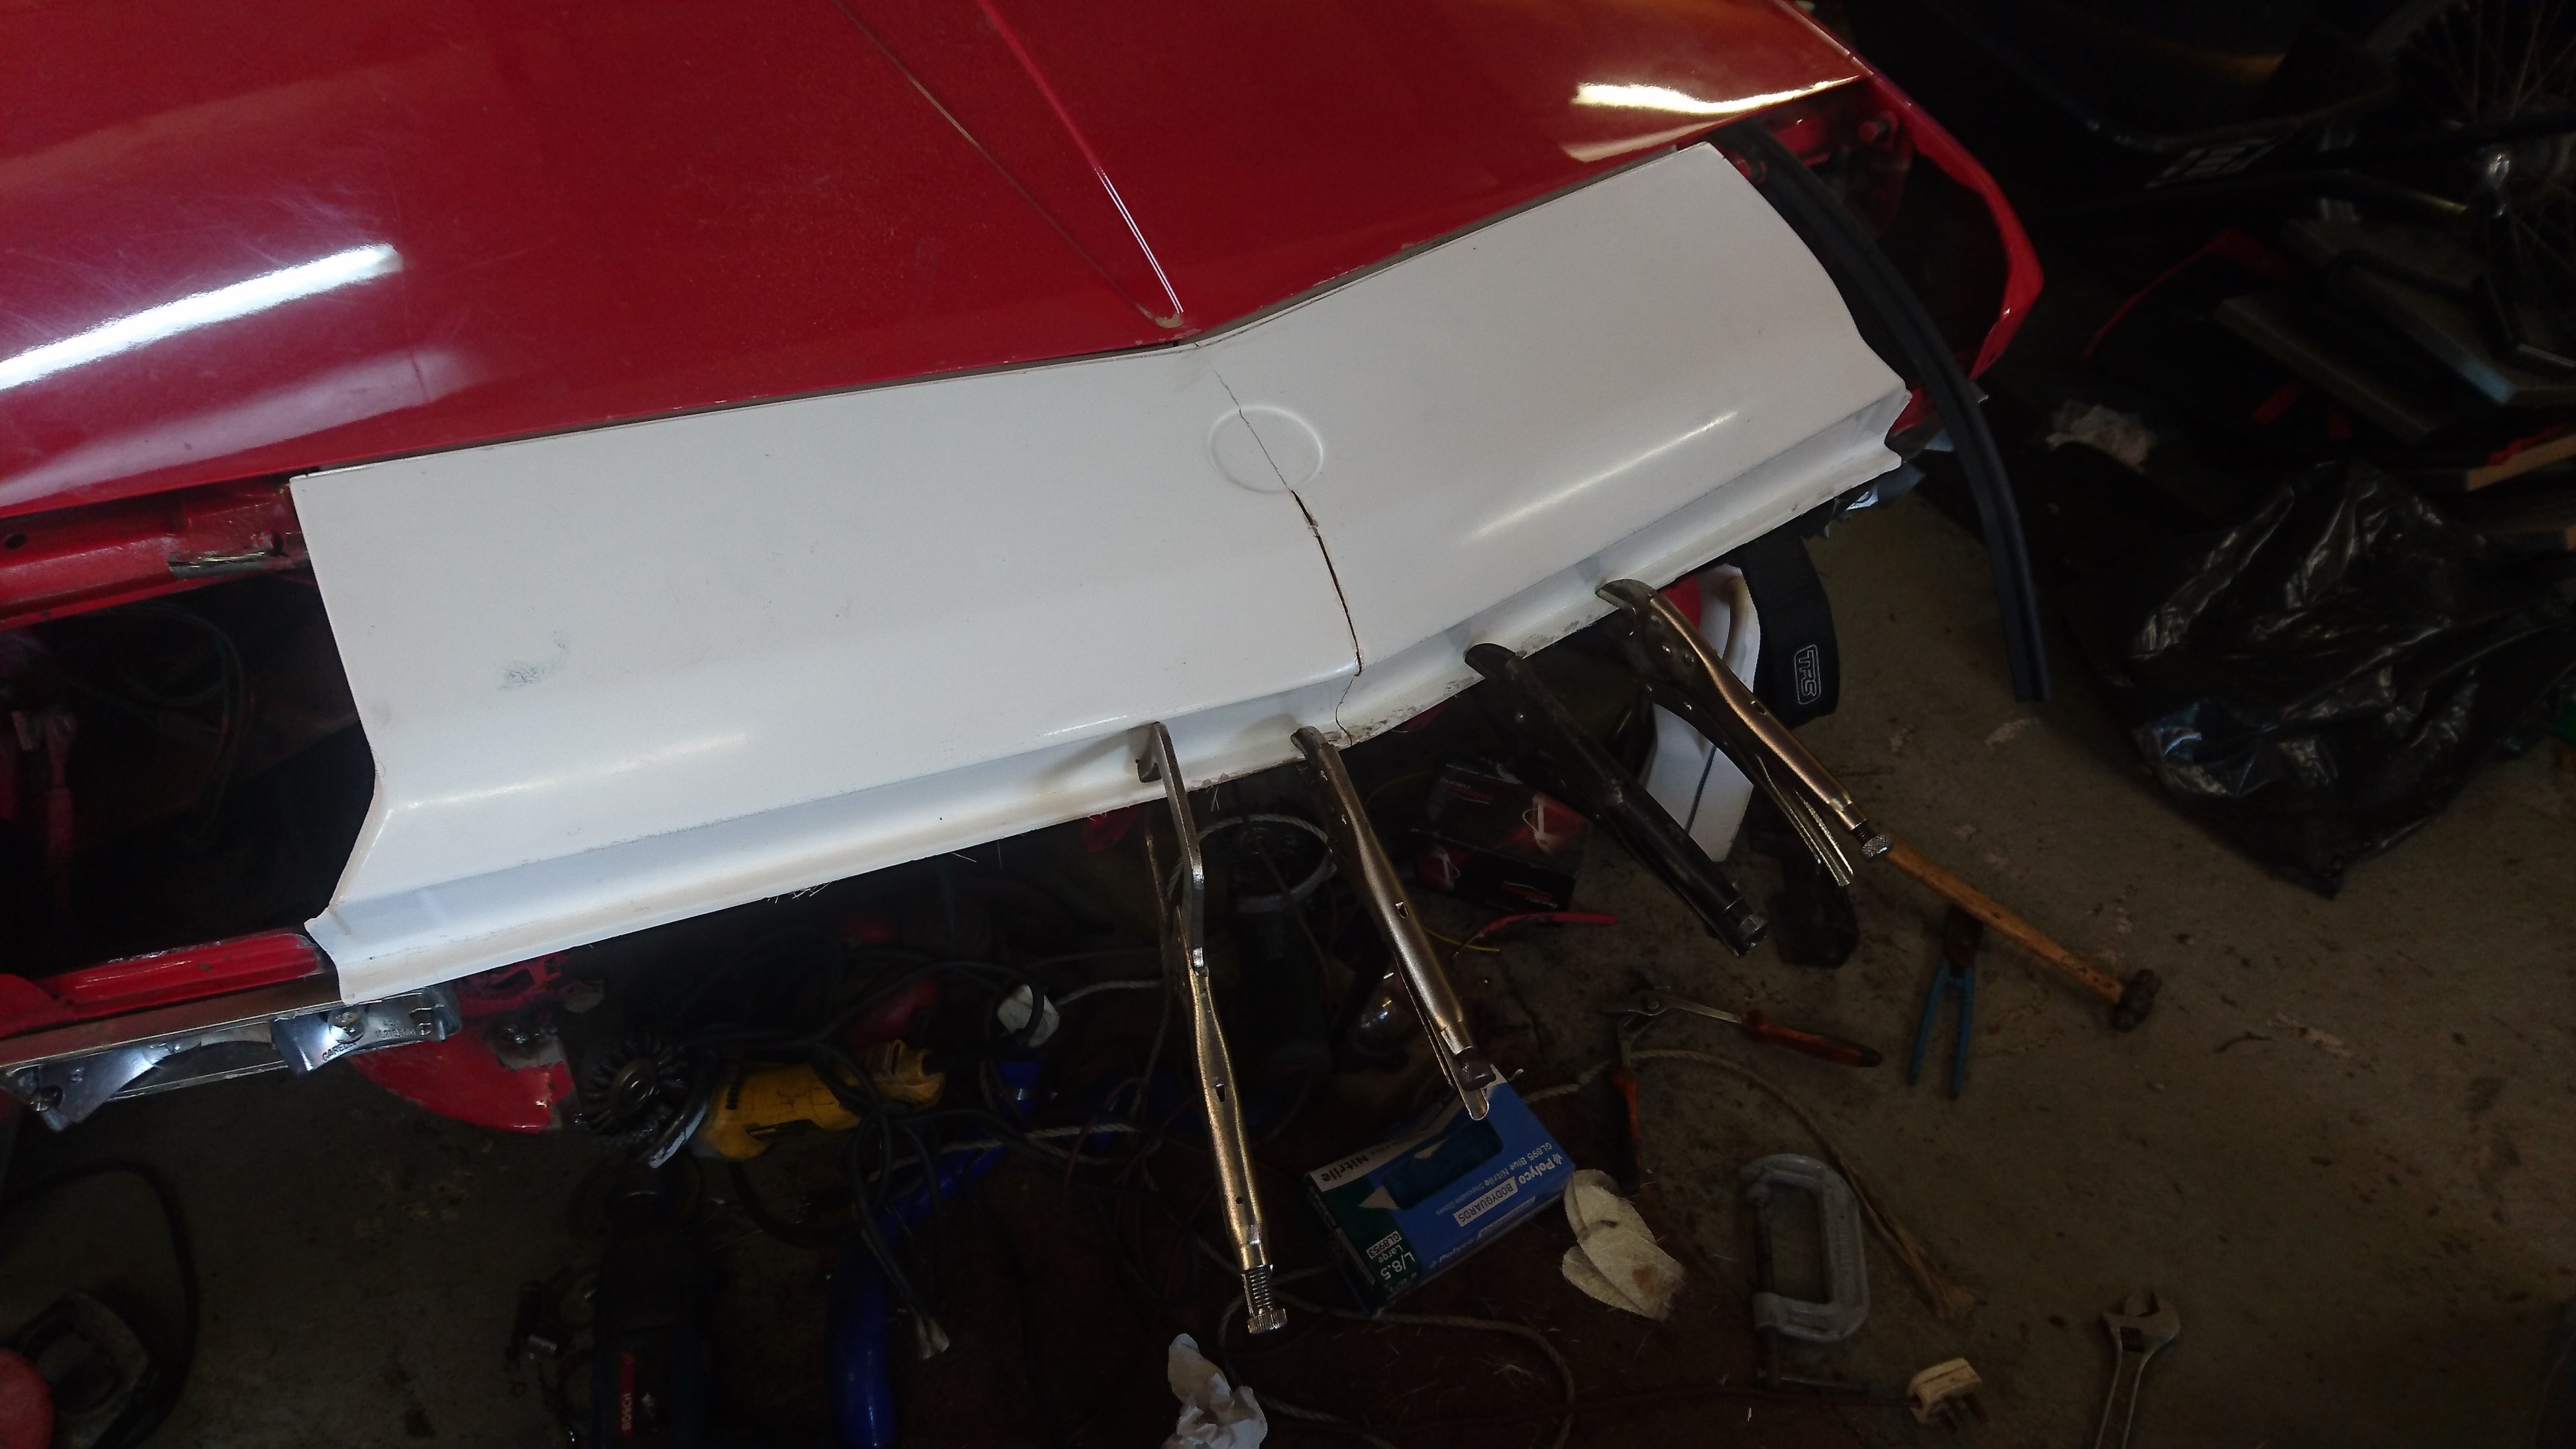
Before:
After:
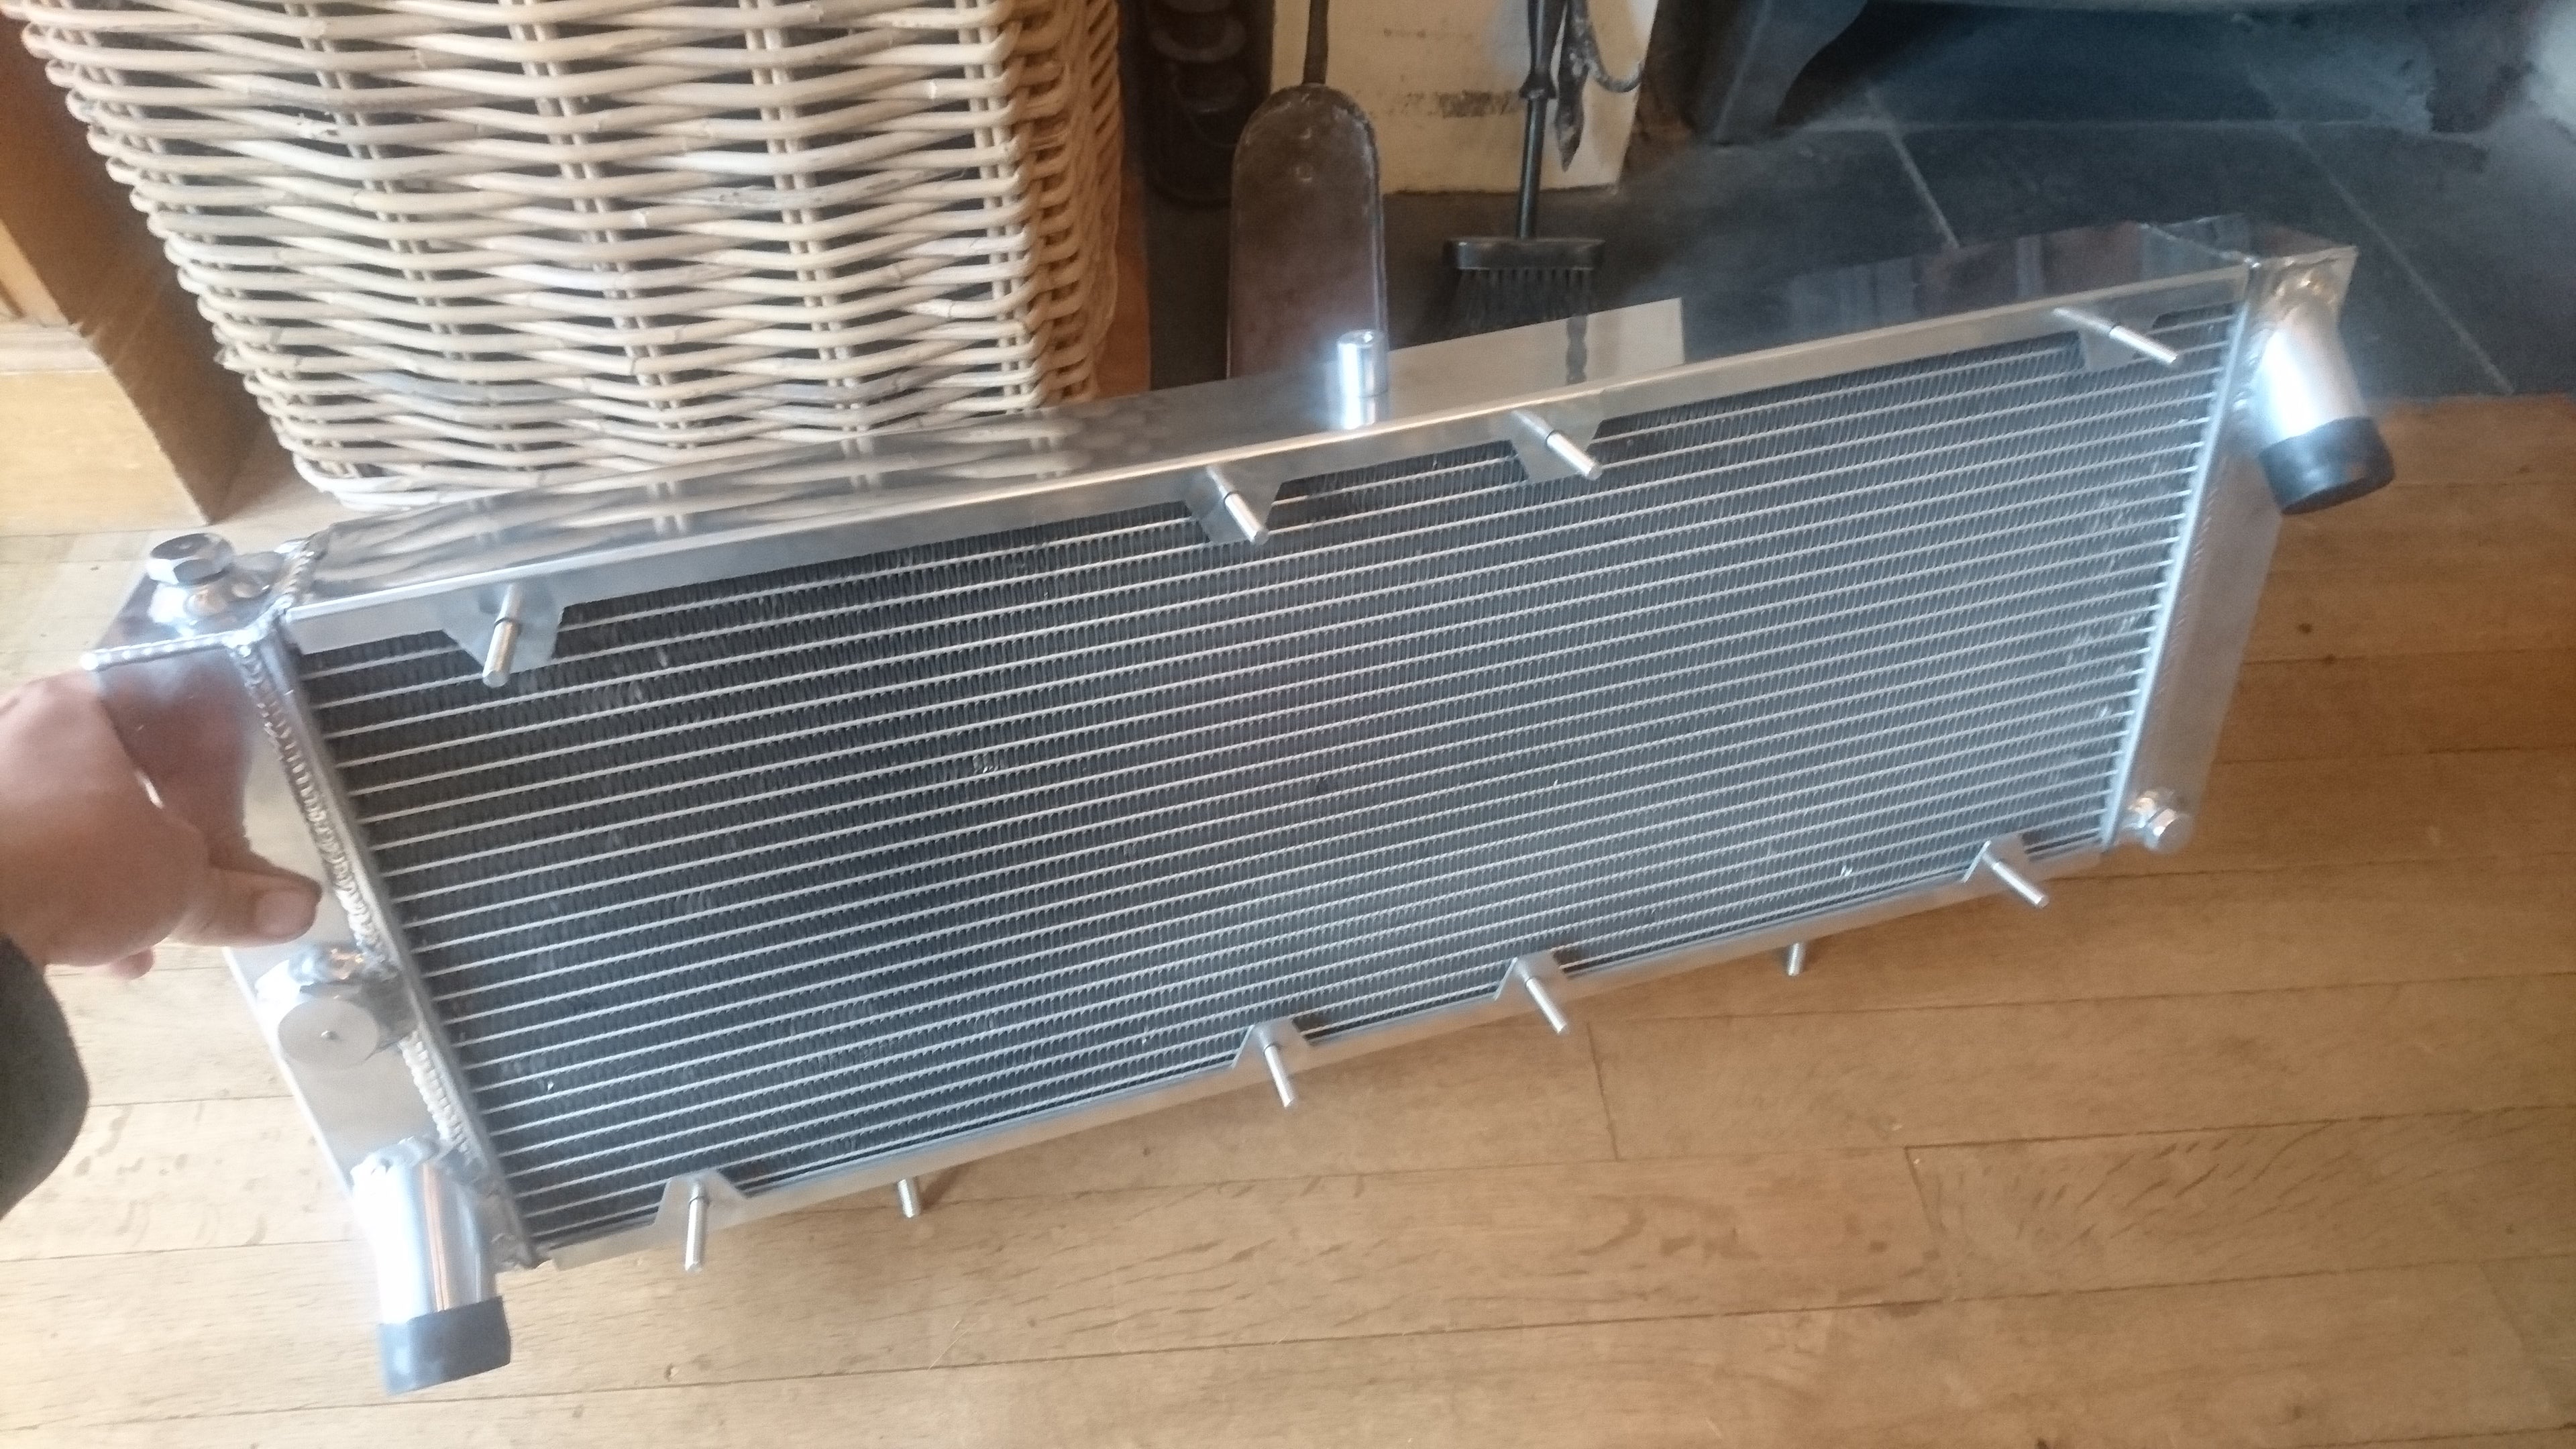
Next step was to sort the rad. Not that it really needed extra cooling at the moment, but in the future I’d like to see if I can push the power up a little on this so an alloy rad would be a good investment :)
Difficult to find in the UK, but I found an outfit in the States selling some really nice ones. Trouble is they were quoting about Ł200 in shipping!
Now, if anyone’s been knocking around here for long enough they’ll remember a bit of an exodus when the forums switched over to kinja. I still buzz about the G+ forum where the refugees live, and a brilliant lady there helped me out with shipping :) can’t remember her oppo handle, but she has a dark green ‘70s Charger ad saved me a bucketload of cash sending this thing over:
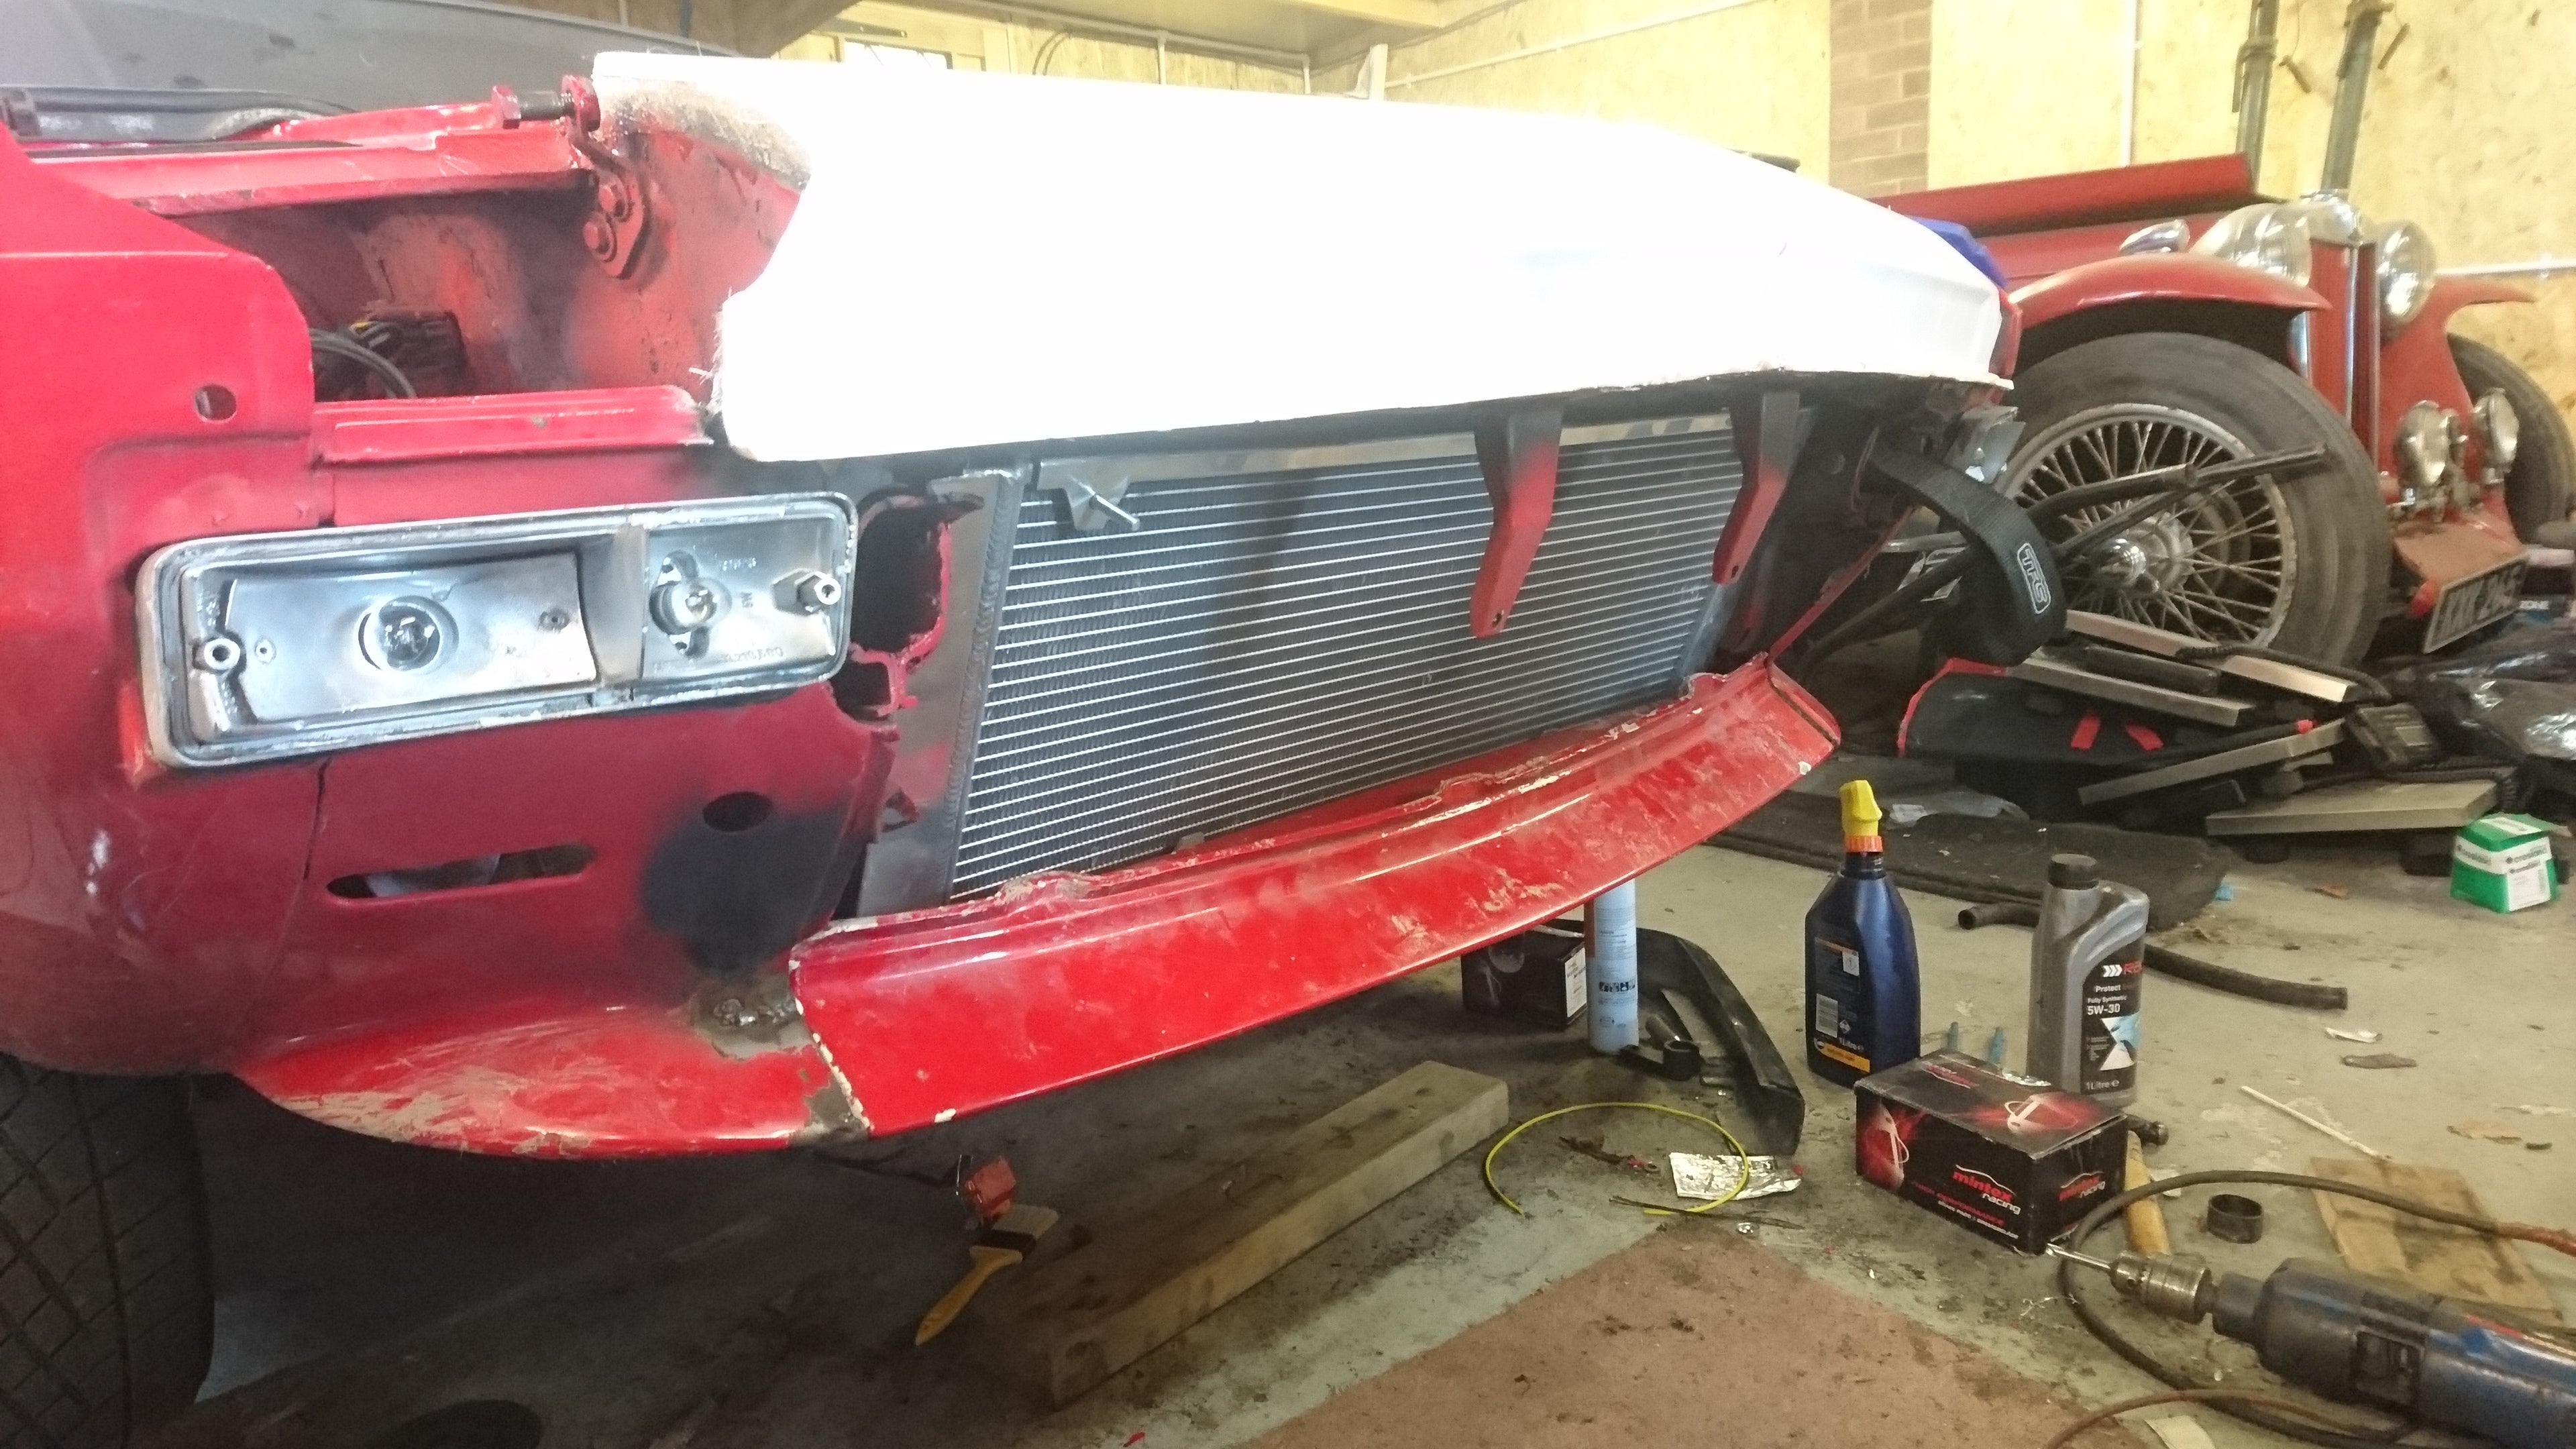
Supposed to be bolt-on, but it fouled the original radiator bracket so I took the opportunity to make a lightweight tubular one :)
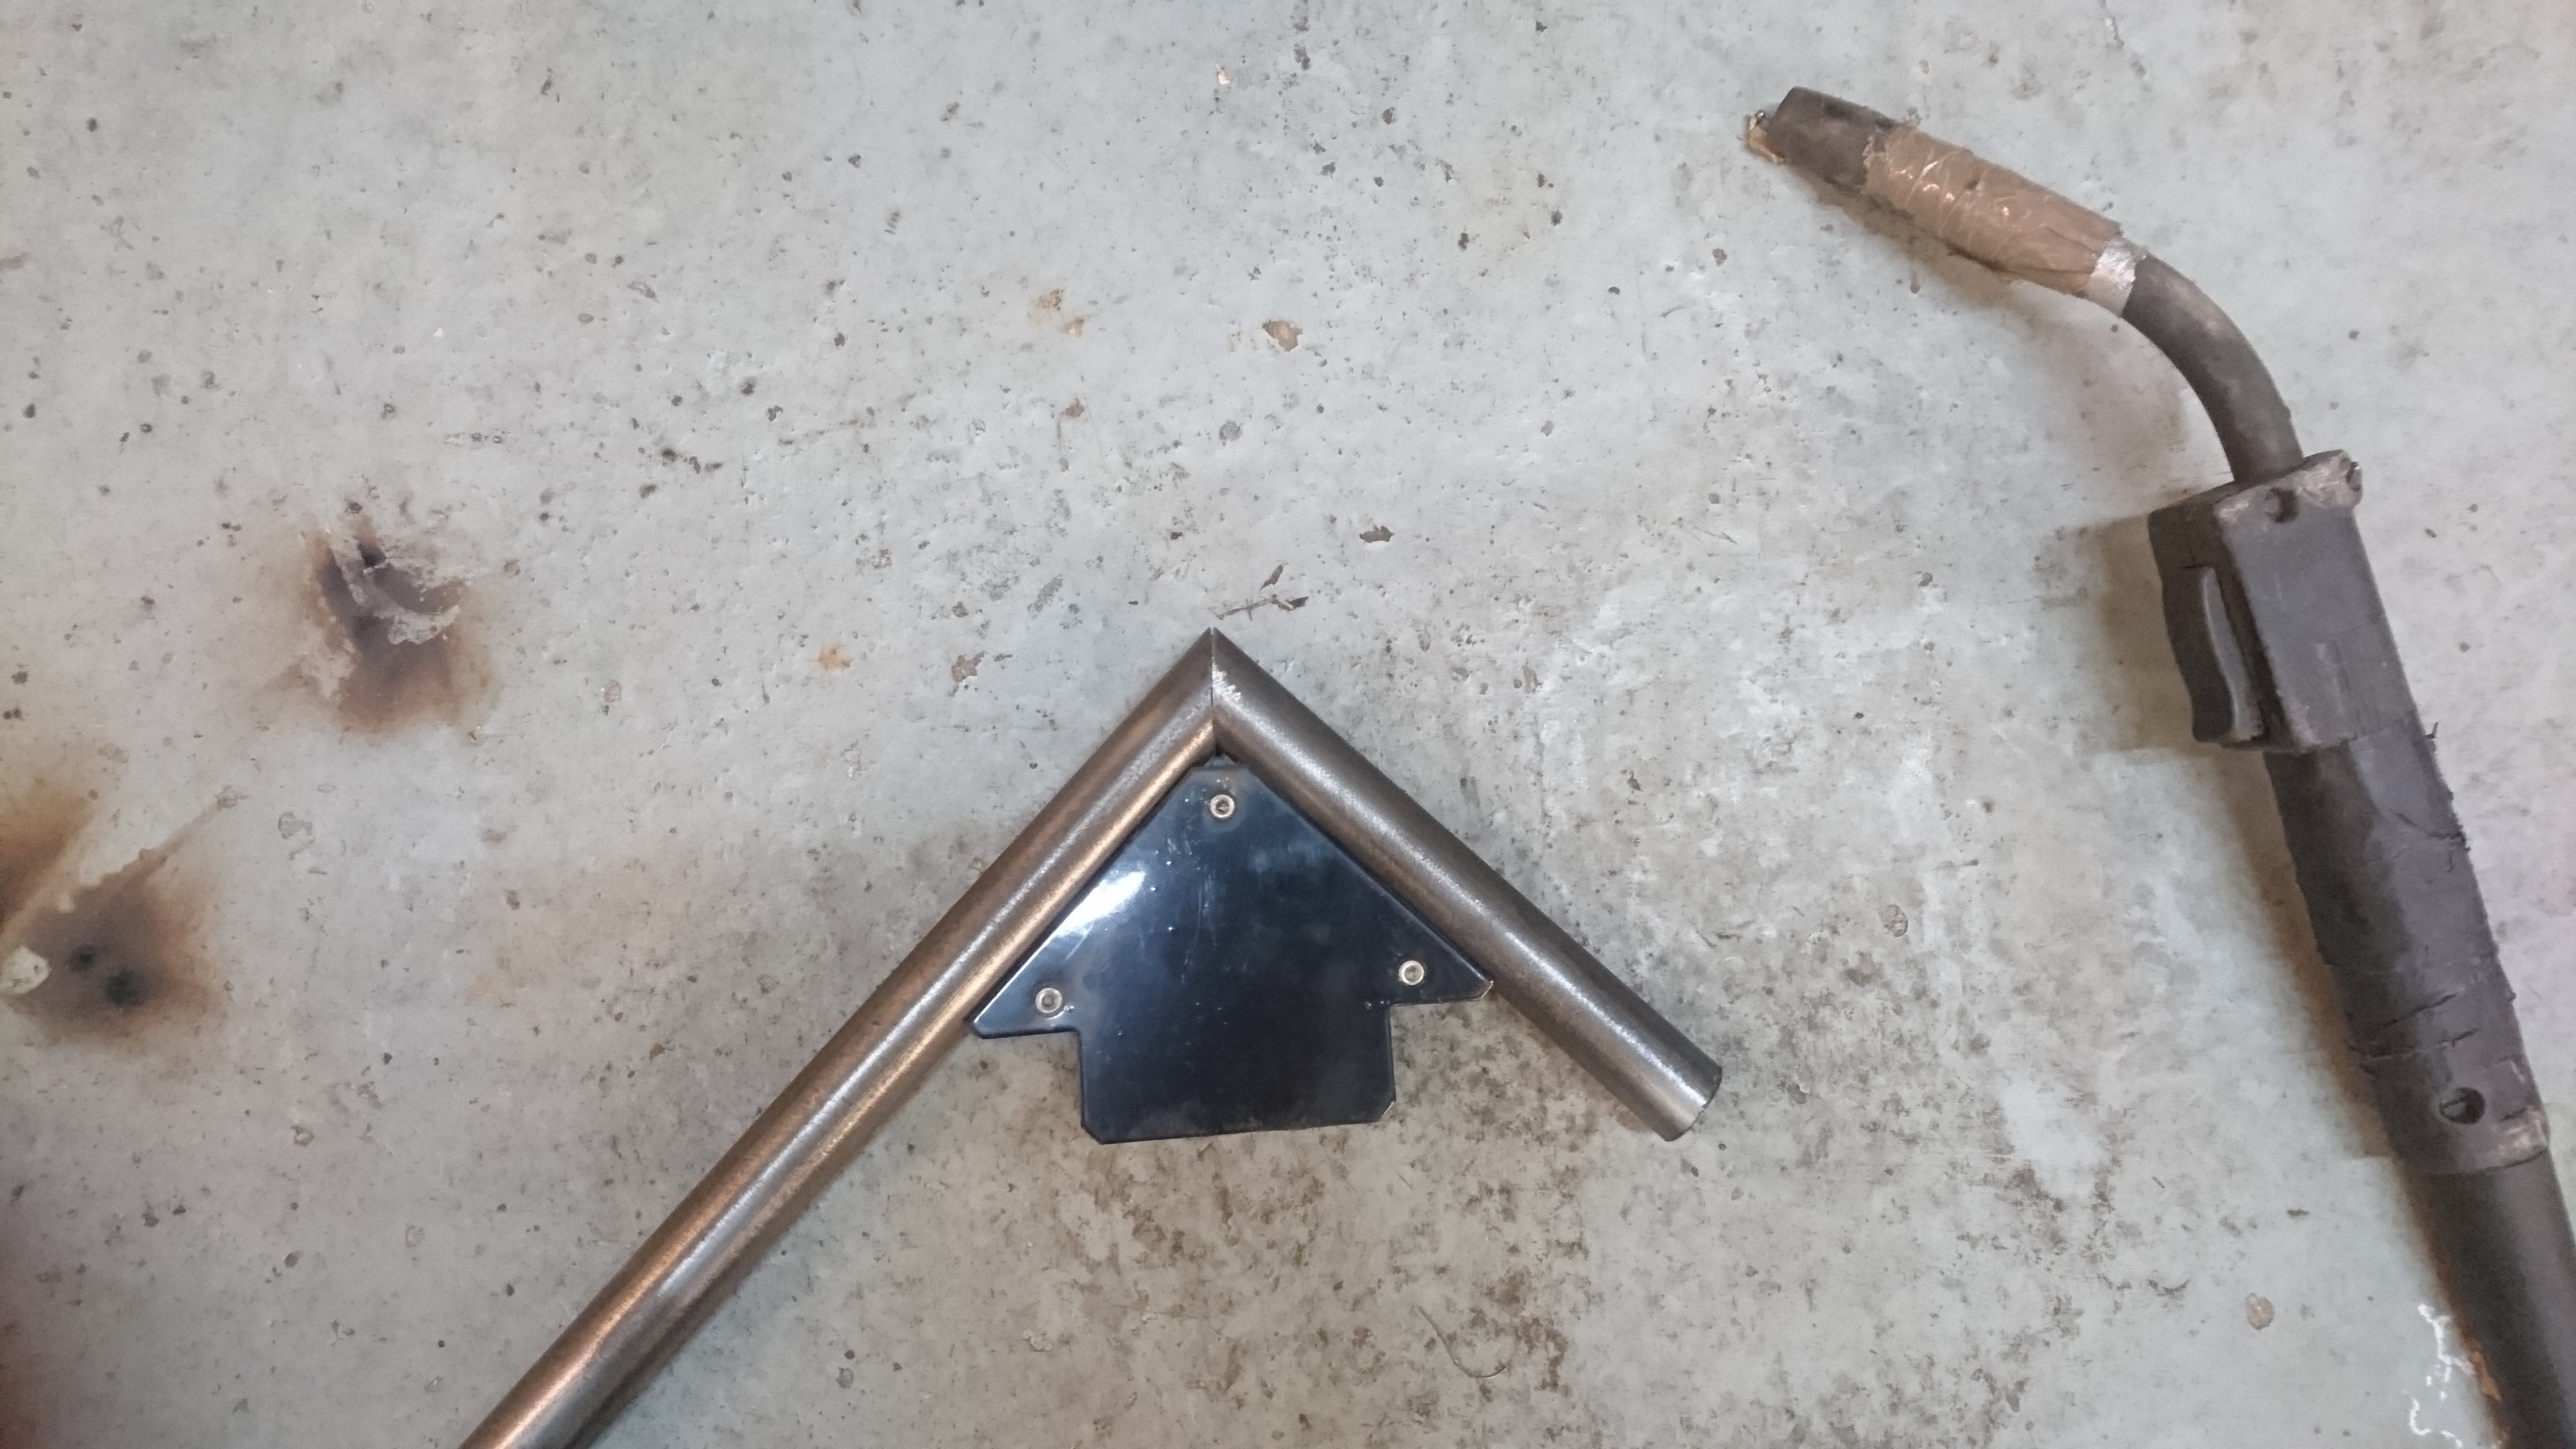
These little magnetic triangles are brilliant bits of kit :)
And fitted :)
Ok, now for the dings and bent suspension. I was originally going to get some quotes for !!!error: Indecipherable SUB-paragraph formatting!!! , but then I thought ‘I’ve got a rubber mallet and a block of 4x2...how hard can it be?’ .
Turns out, not that difficult.
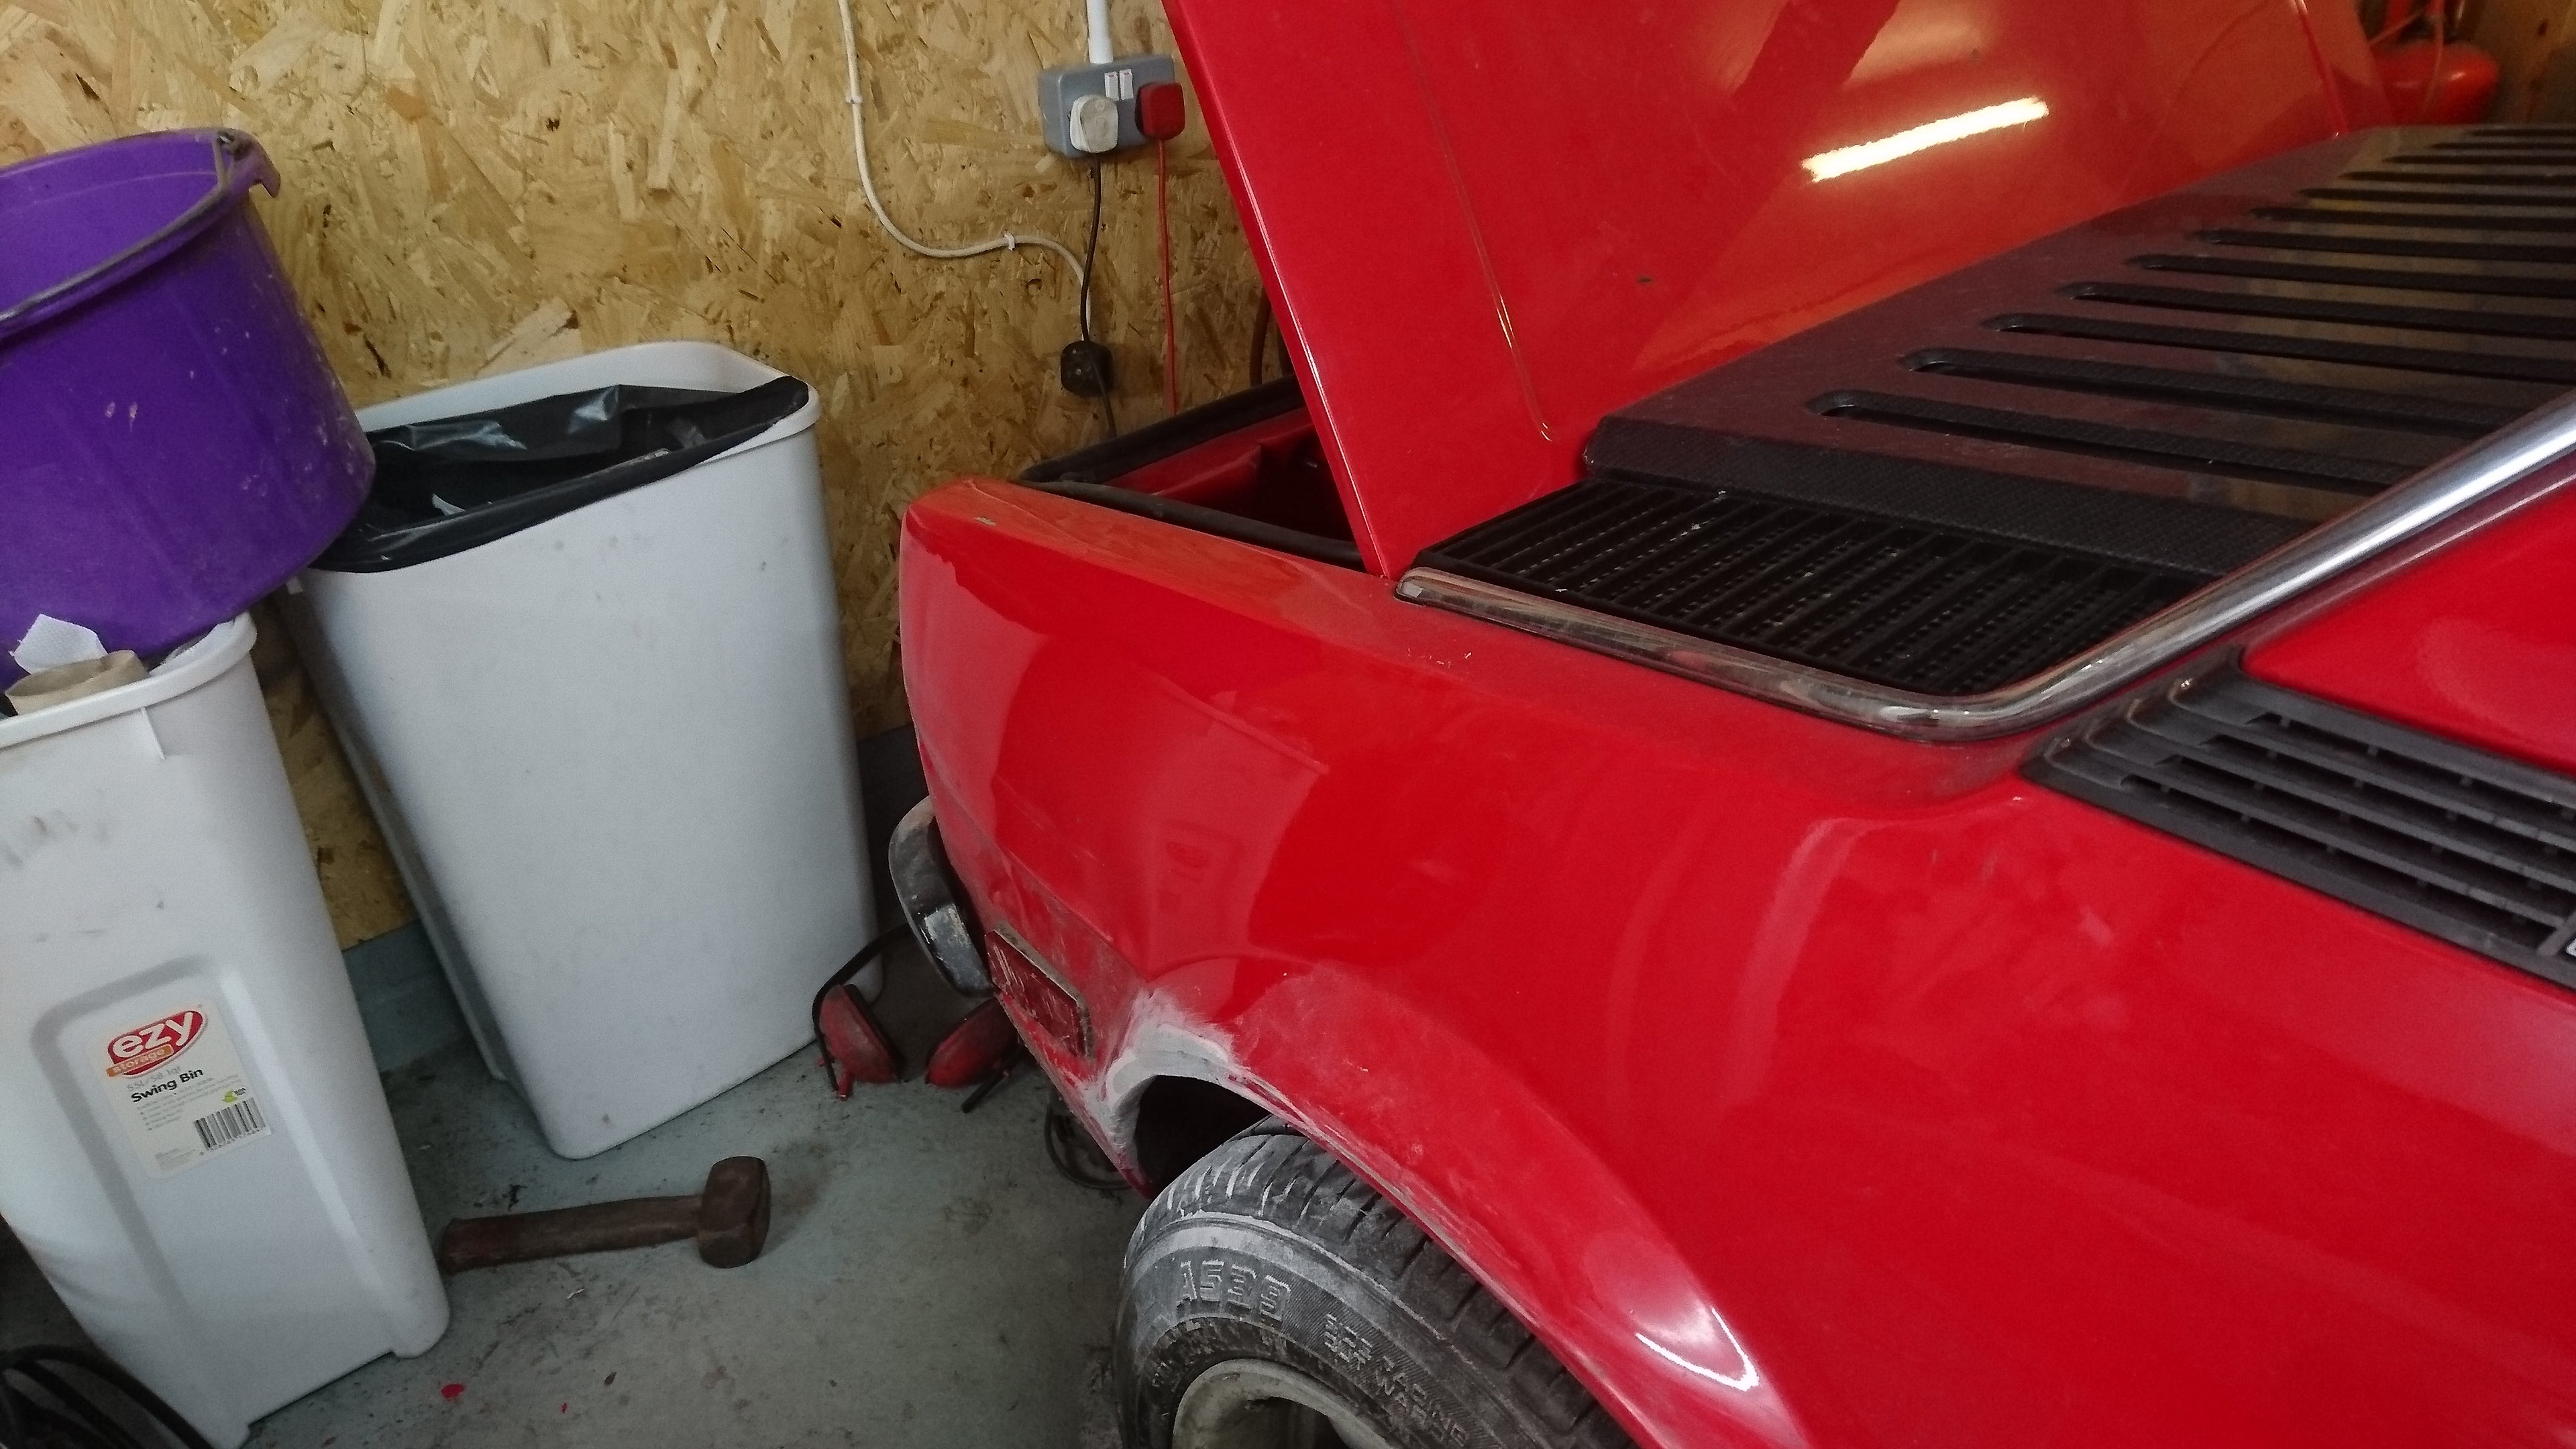
Gutted I didn’t get a before pic, but there used to be a massive dent on the rear part of this wing. Pushed in a good half-inch over a dinner-plate-sized area. Just look at the reflection of the bin in it now. Flat as a pancake ;)
There’s still some wrinkles at the back where I couldn’t get the mallet behind properly, and below where there’s a complicated little crease, but it’s about a billion times better than it used to be.
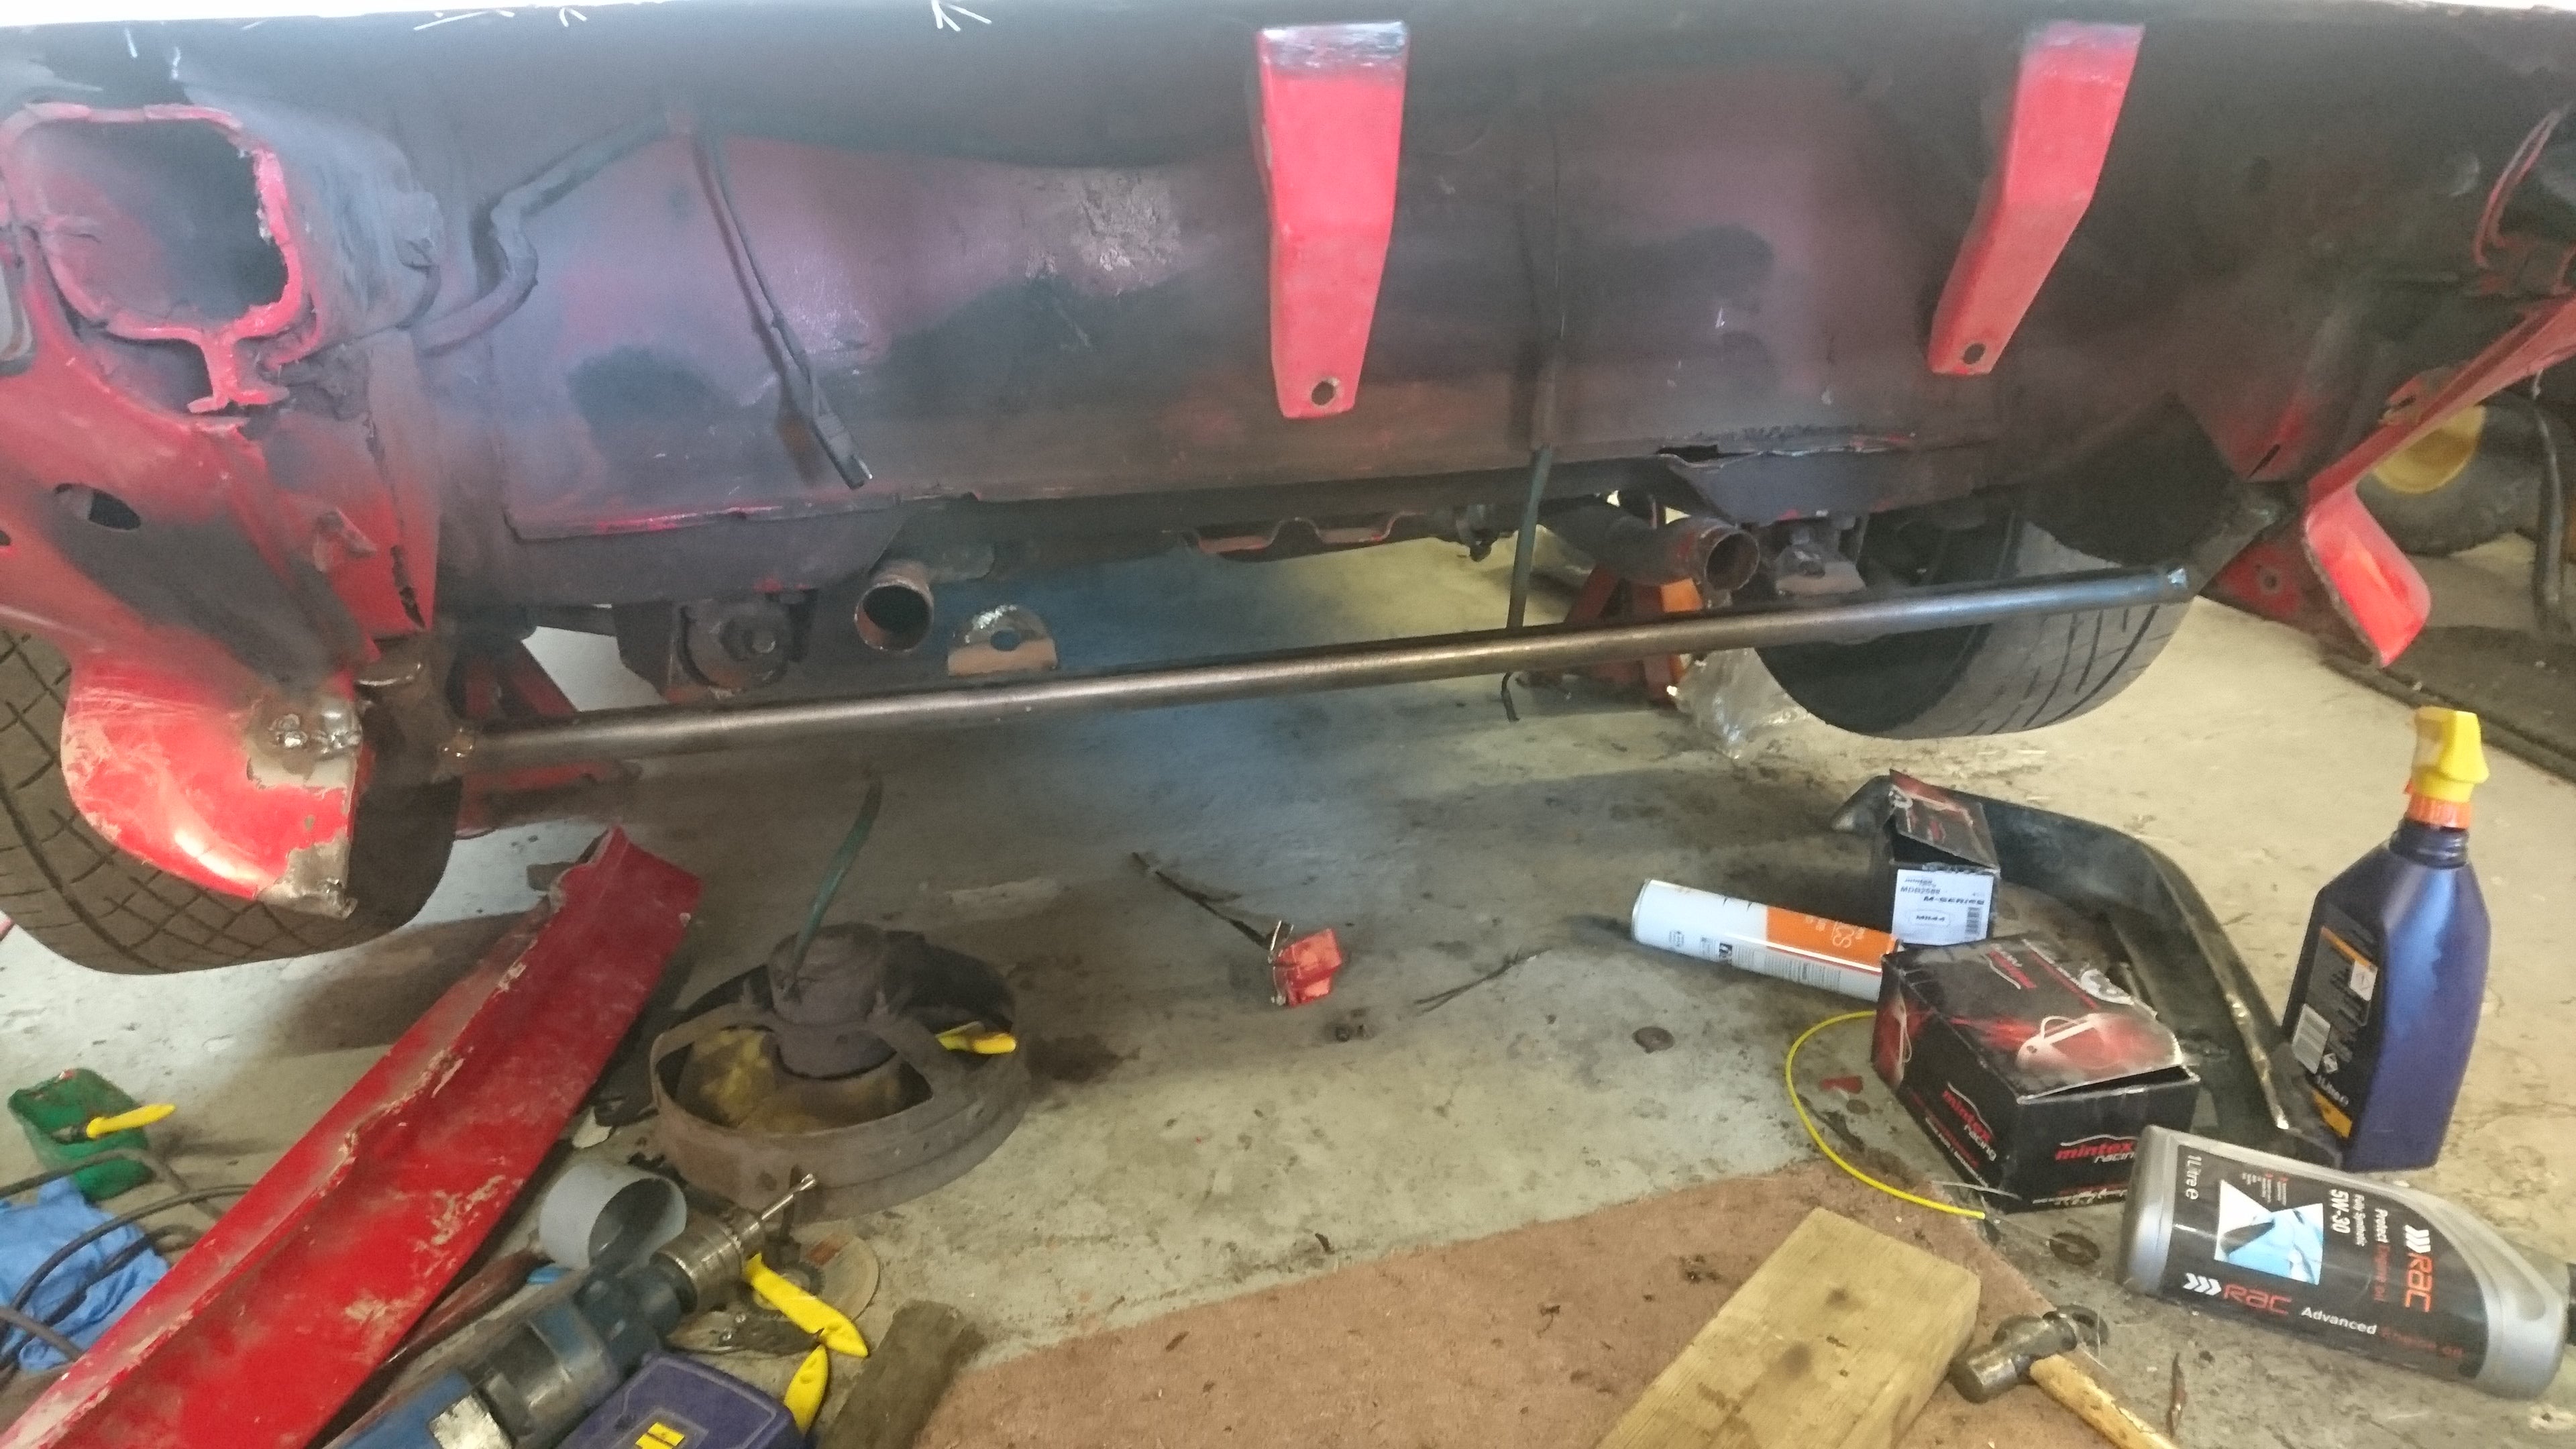
As for suspension, you can see in this pic on the lower right where the forward suspension link has been pulled downwards by the impact:

The gap you can see at the back in between the two downward prongs and the radiator mount bar.
Jacked that up and welded it back together. I also discovered the big ol’ cast steel transverse link was tweaked a bit. Expensive buggers to replace, so I carefully straightened it out in my pipe bender which worked a treat :)
The knocking shock/strut turned out to be the shock insert moving inside the strut. Further inspection showed that the big threaded section that clamps the shock in had been expanded slightly by the impact so that it would slip if you tried to screw it in tight enough to hold it steady.
After a bit of an abortive search for replacement struts I decided to fix that too. Stuck it in the vice with a big beefy socket beneath it (securing it on 3 sides) and the top bit screwed in. Then proceeded to ‘tap’ it with a big lump hammer progressively around and around the outside shrinking it until you could bolt it up ok. Again, worked a treat :)
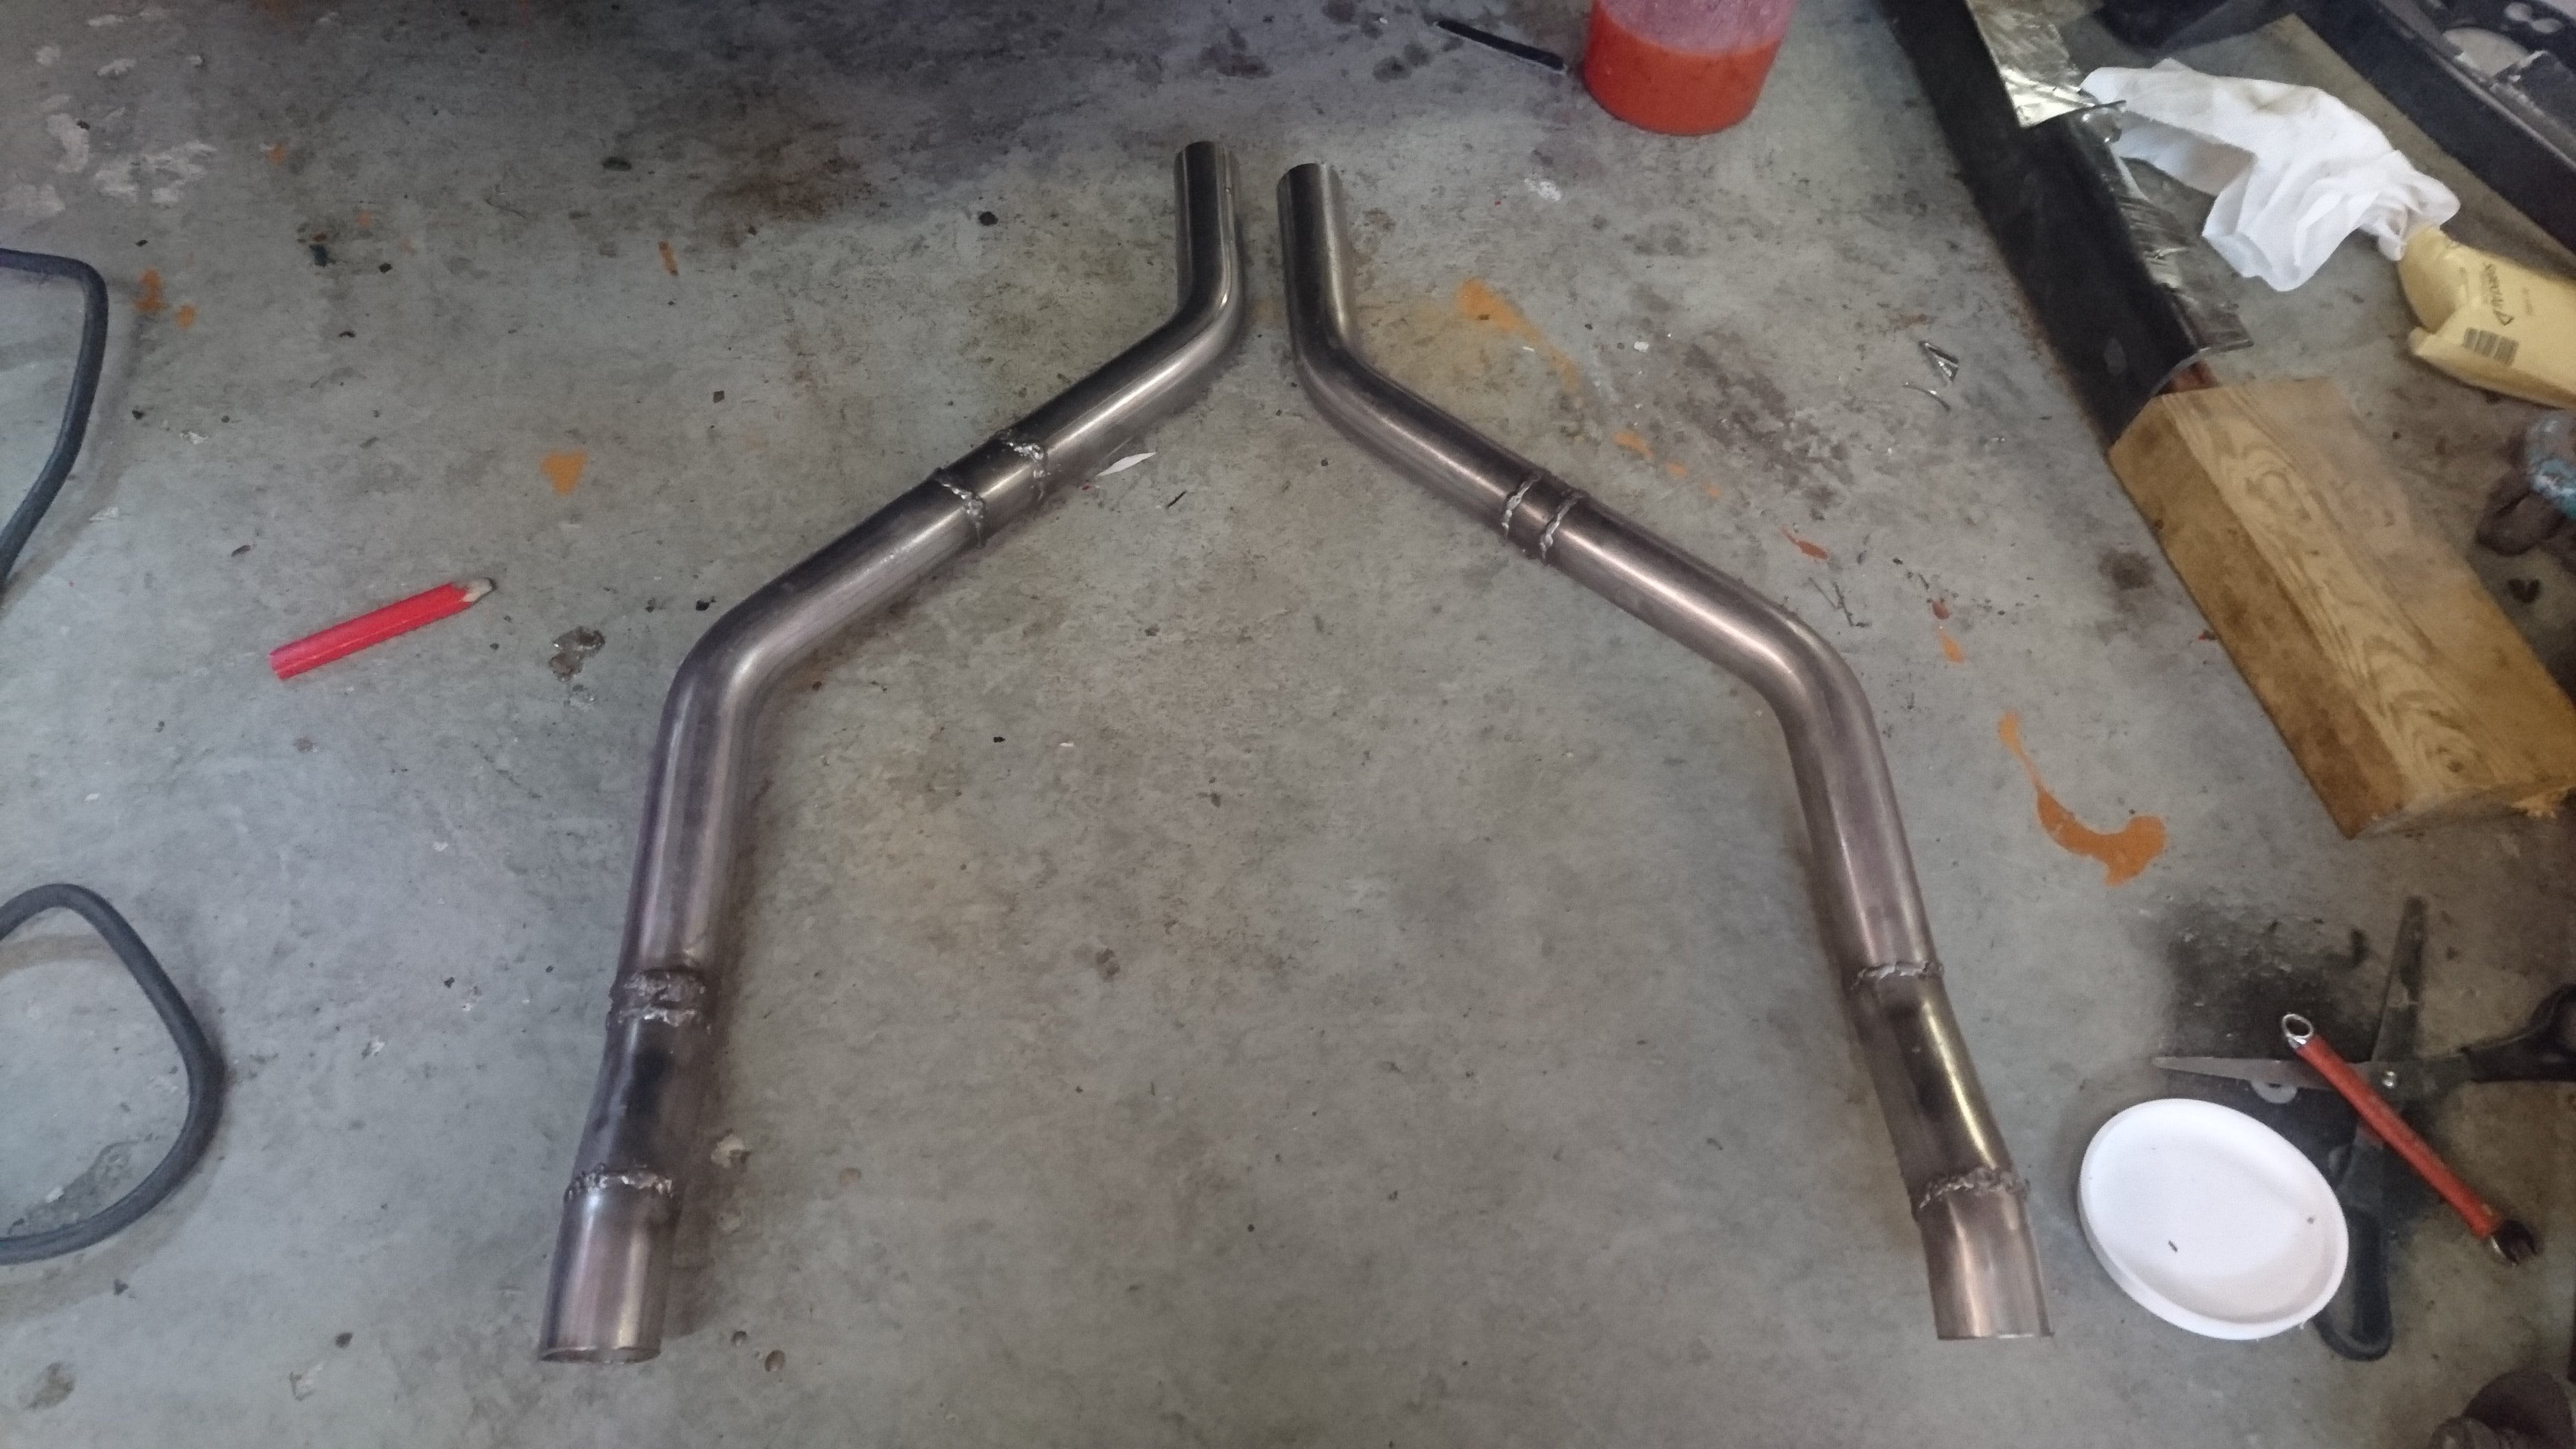
Next thing I noticed was that the coolant pipes running along the front of the car were leaking a bit. Fair amount of faffing about to get them sealed, but eventually I made these :)

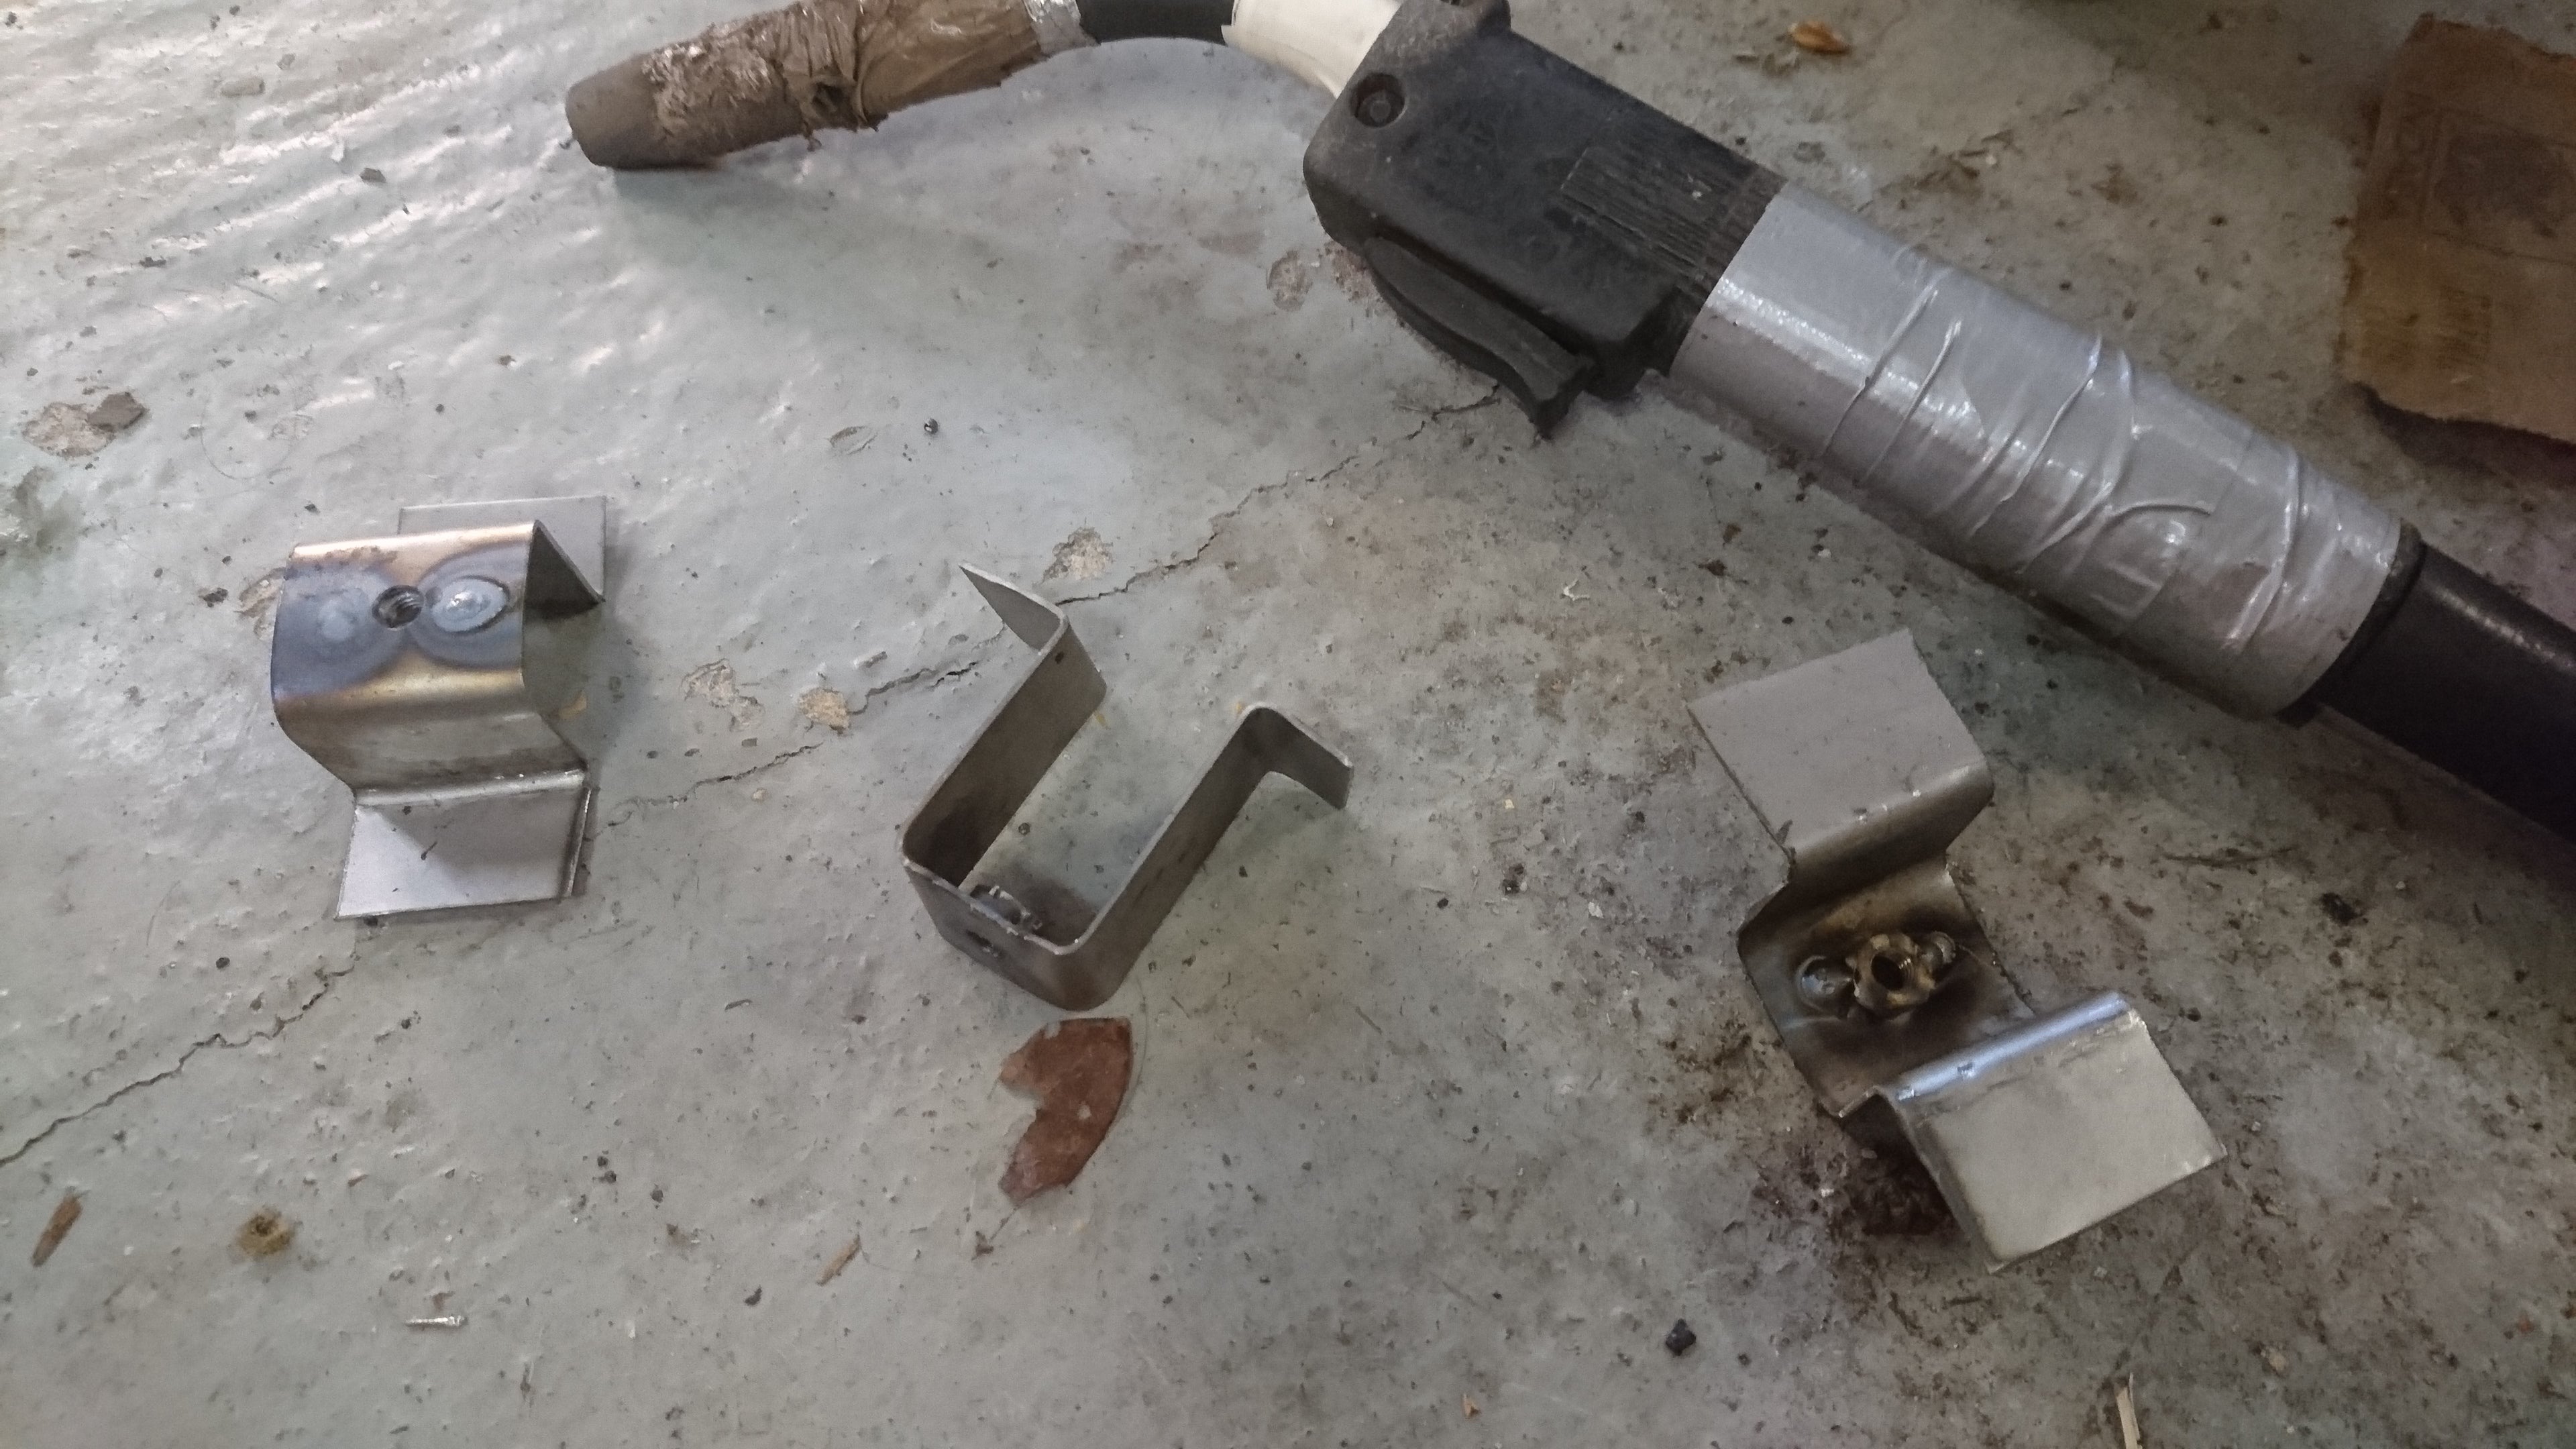
Hum, what was next? Oh yeah, bumpers. I’d picked up some fibreglass replacement ones but they came without mounting hardware so made up some little brackets and rubber mounts to fit them to the body and fibreglassed them in place.

Discovered that the whining fuel pump was due to a thoroughly blocked filter. Replaced that (and the pump for good measure) and the running problems sorted themselves :)
Noticed that the handbrake probably wouldn’t pass MoT so set about adjusting that. Had to widen the access panel underneath the car as the new coolant hose routing at the back ran directly over the old access hole.

Adjsutment didn’t really fix it as they didn’t seem to be releasing properly, so took the calipers apart to have a look why. Glad I did as this is what came out:
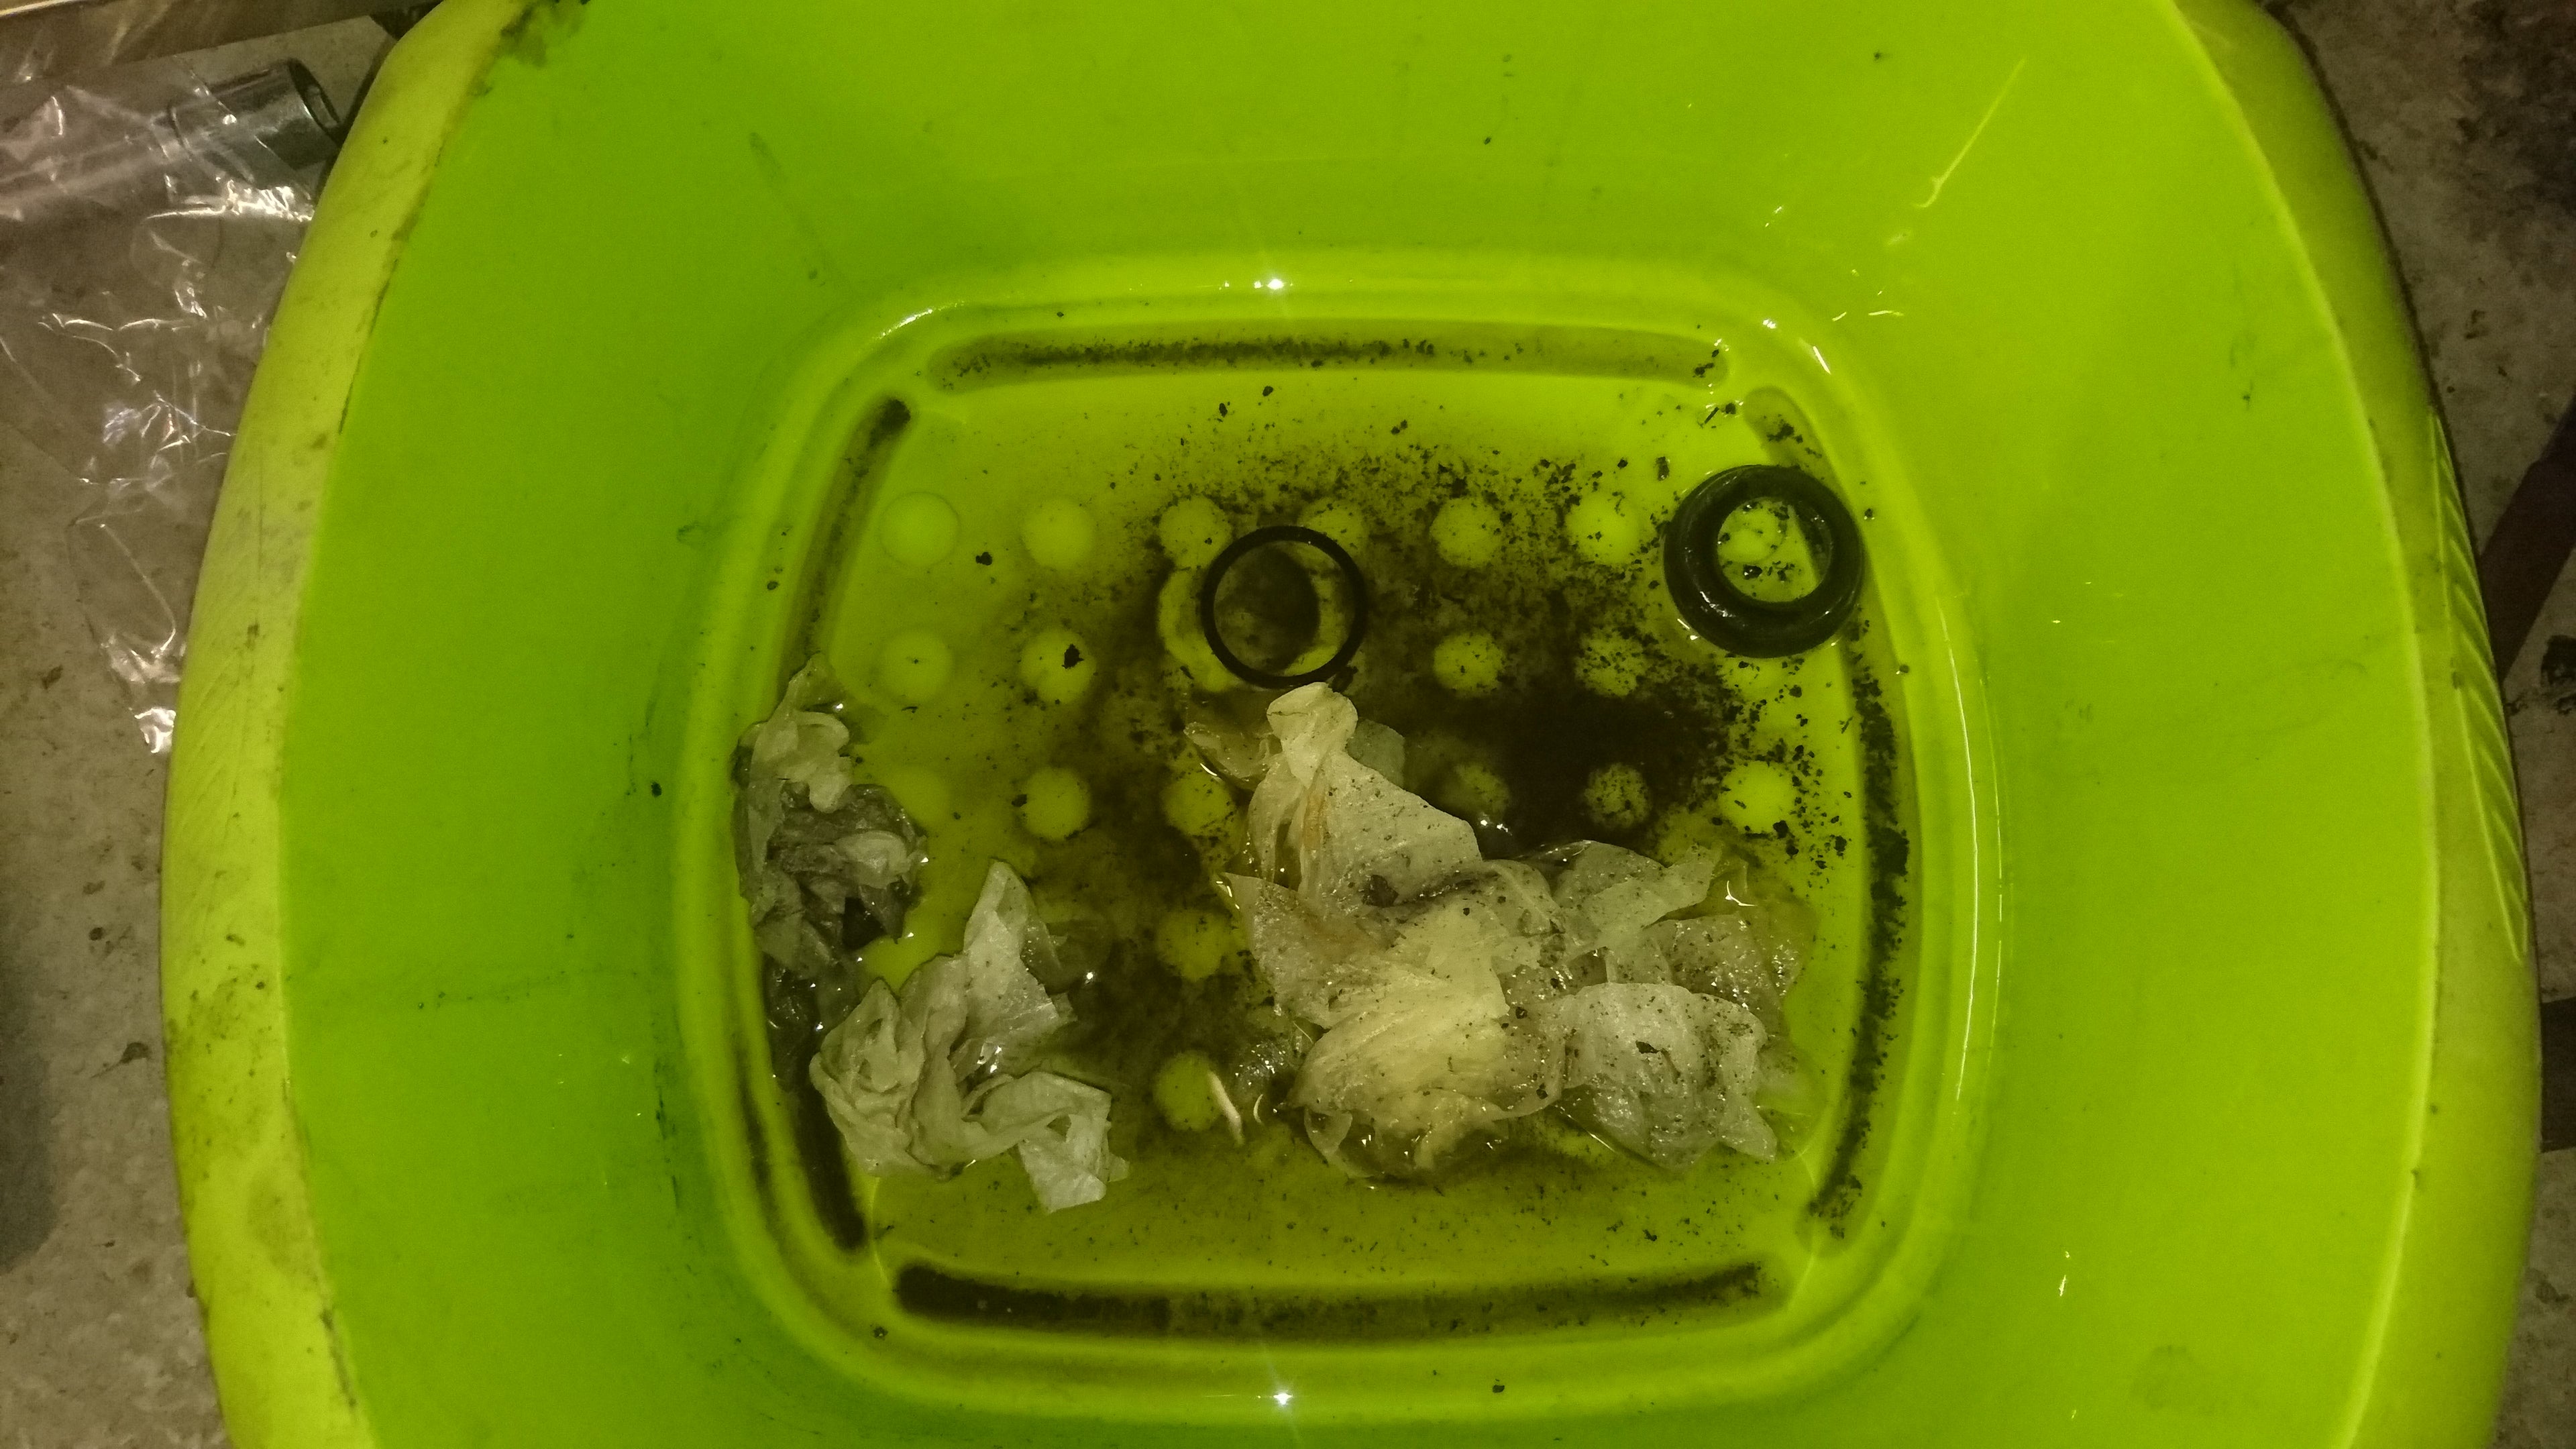
Some of those chunks of rust are a good few millimetres in diameter. Plenty enough to get stuck in brake pipes. We reckoned the master cylinder had probably gone rusty inside as it was pretty rusty outside so set about replacing that. Right pain in the backside job that. Who puts a brake master cylinder in the driver’s footwell?
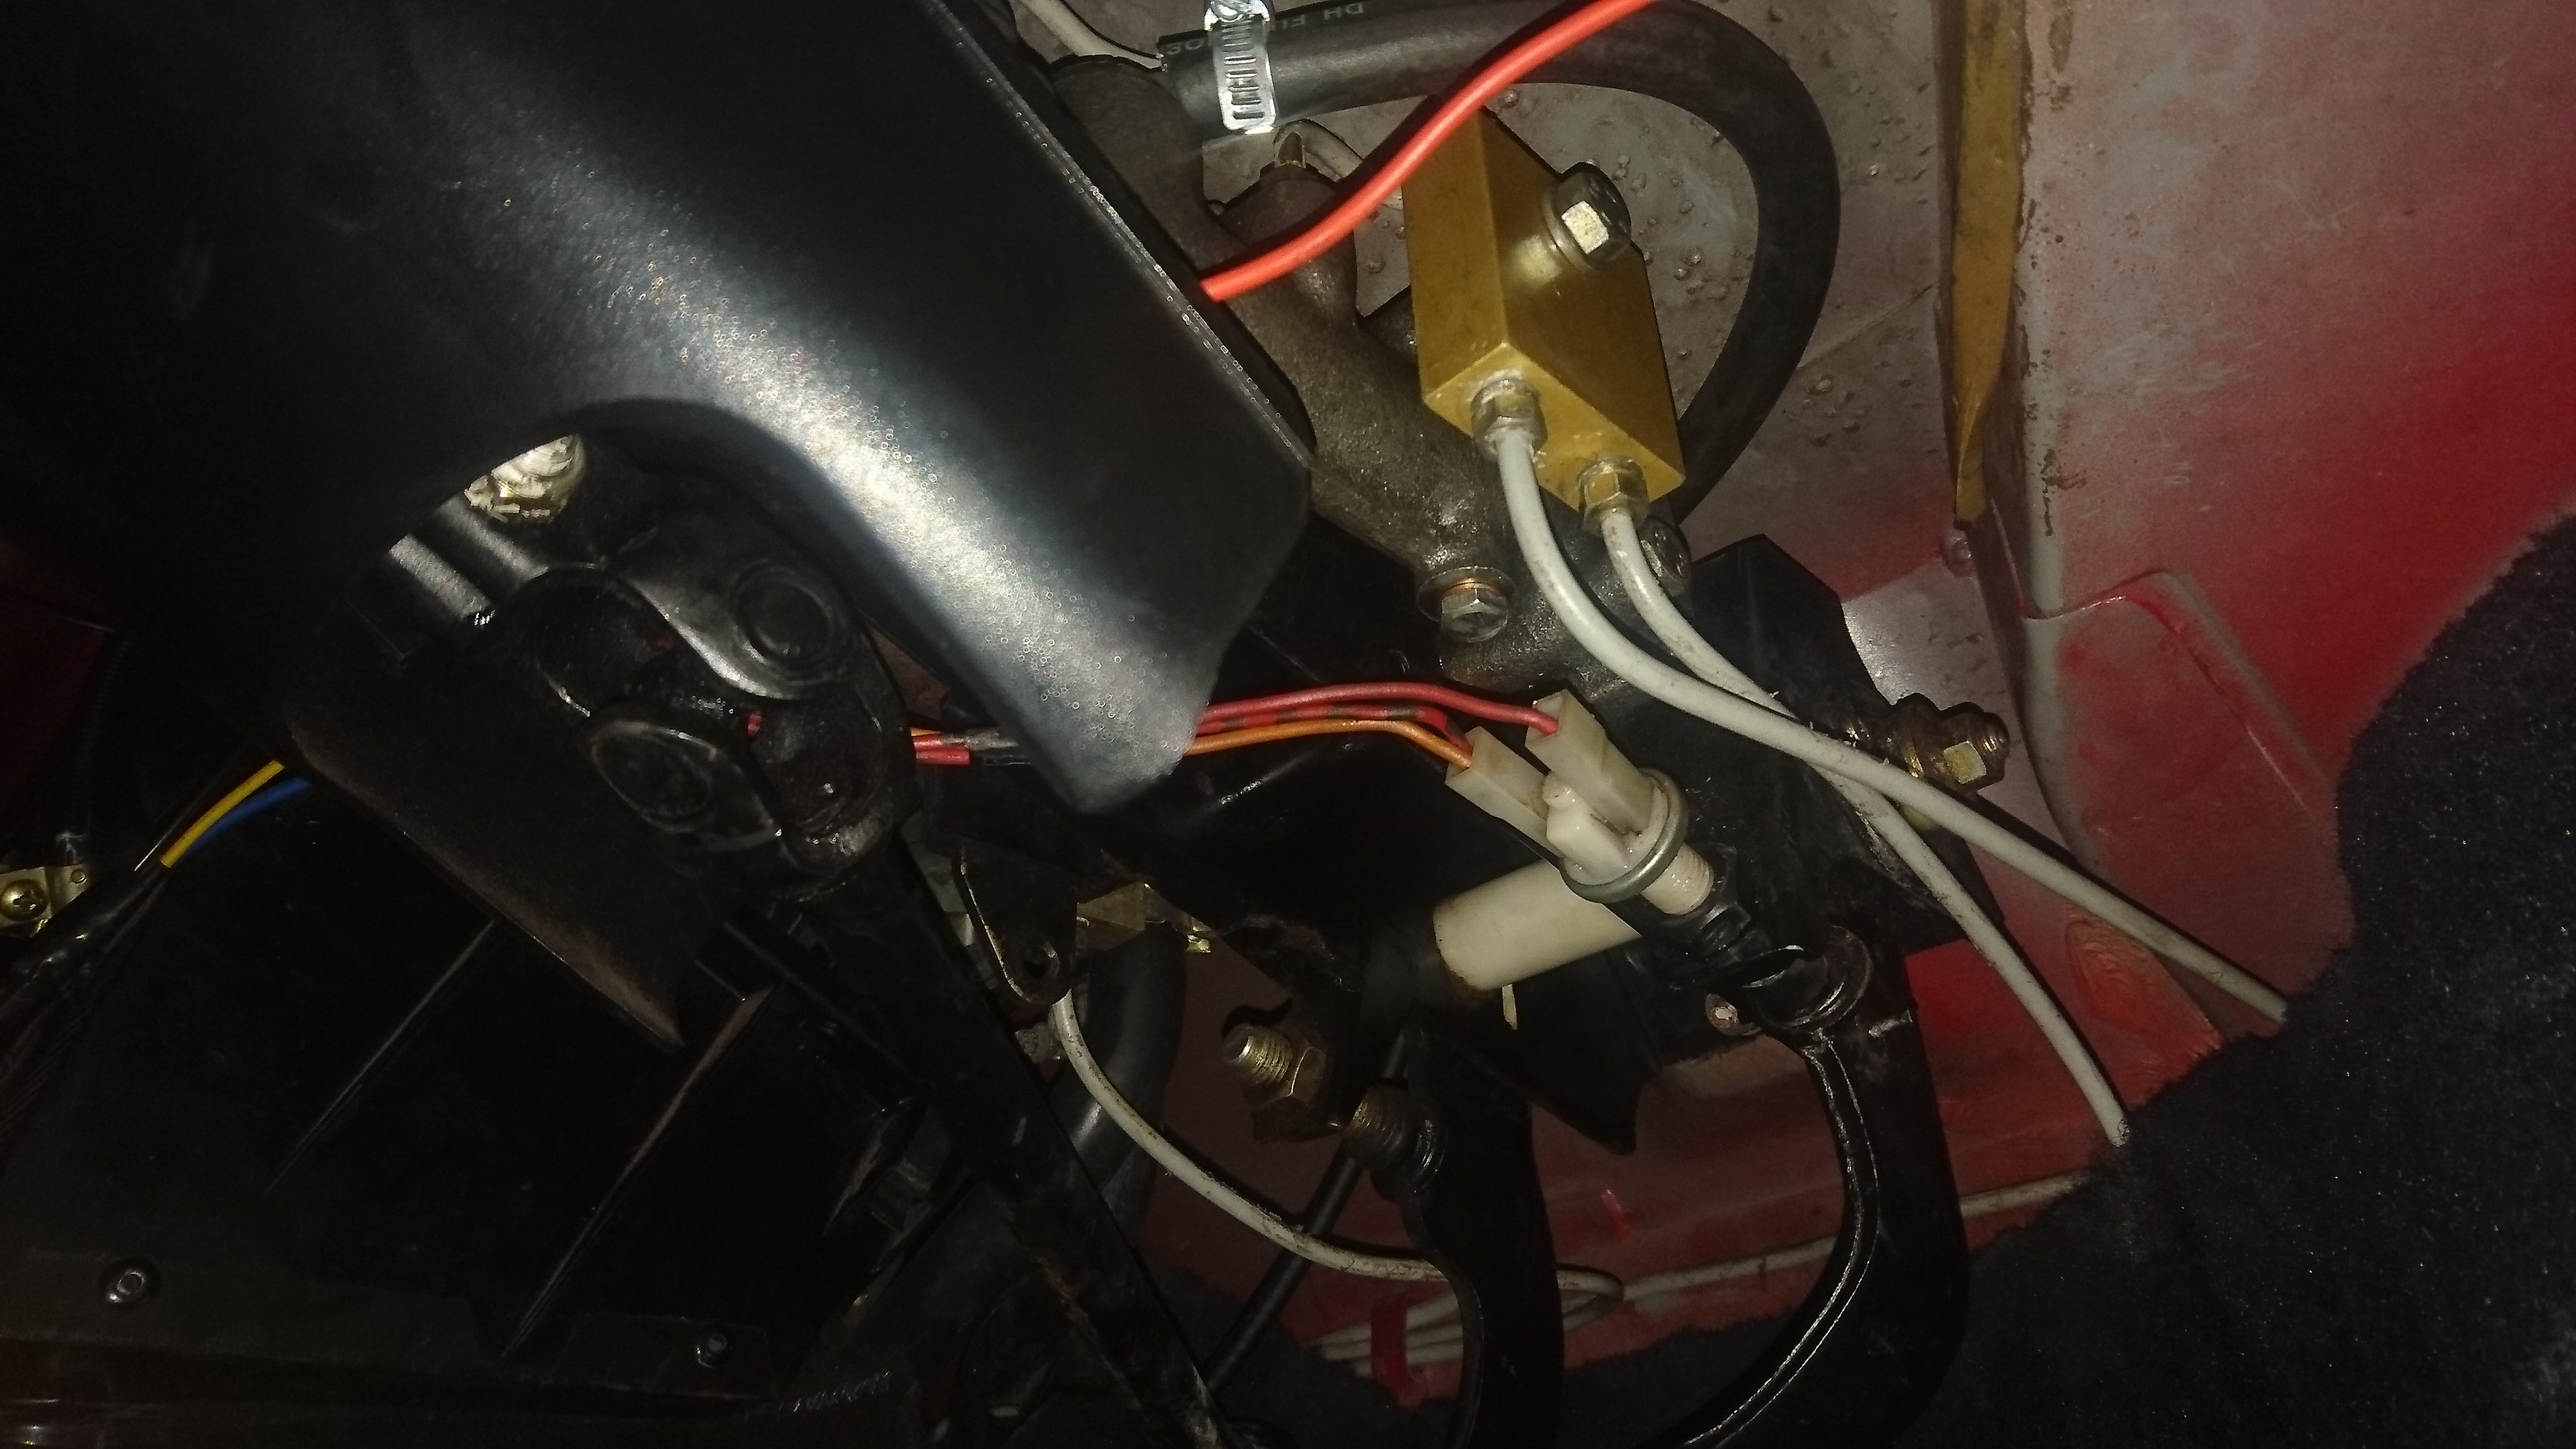
Replaced that (somehow managing to avoid spilling brake fluid all over the footwell which was a minor miracle). Also resealed all the brakes while I was at it to check that they didn’t have buckets of rust inside them too. Bleeding them was a pain as one of the banjo fittings wasn’t sealing properly. The only way we found out is that when someone leant on the pedal quite hard it sent a jet of brake fluid across the garage. Some better quality copper washers fixed that.
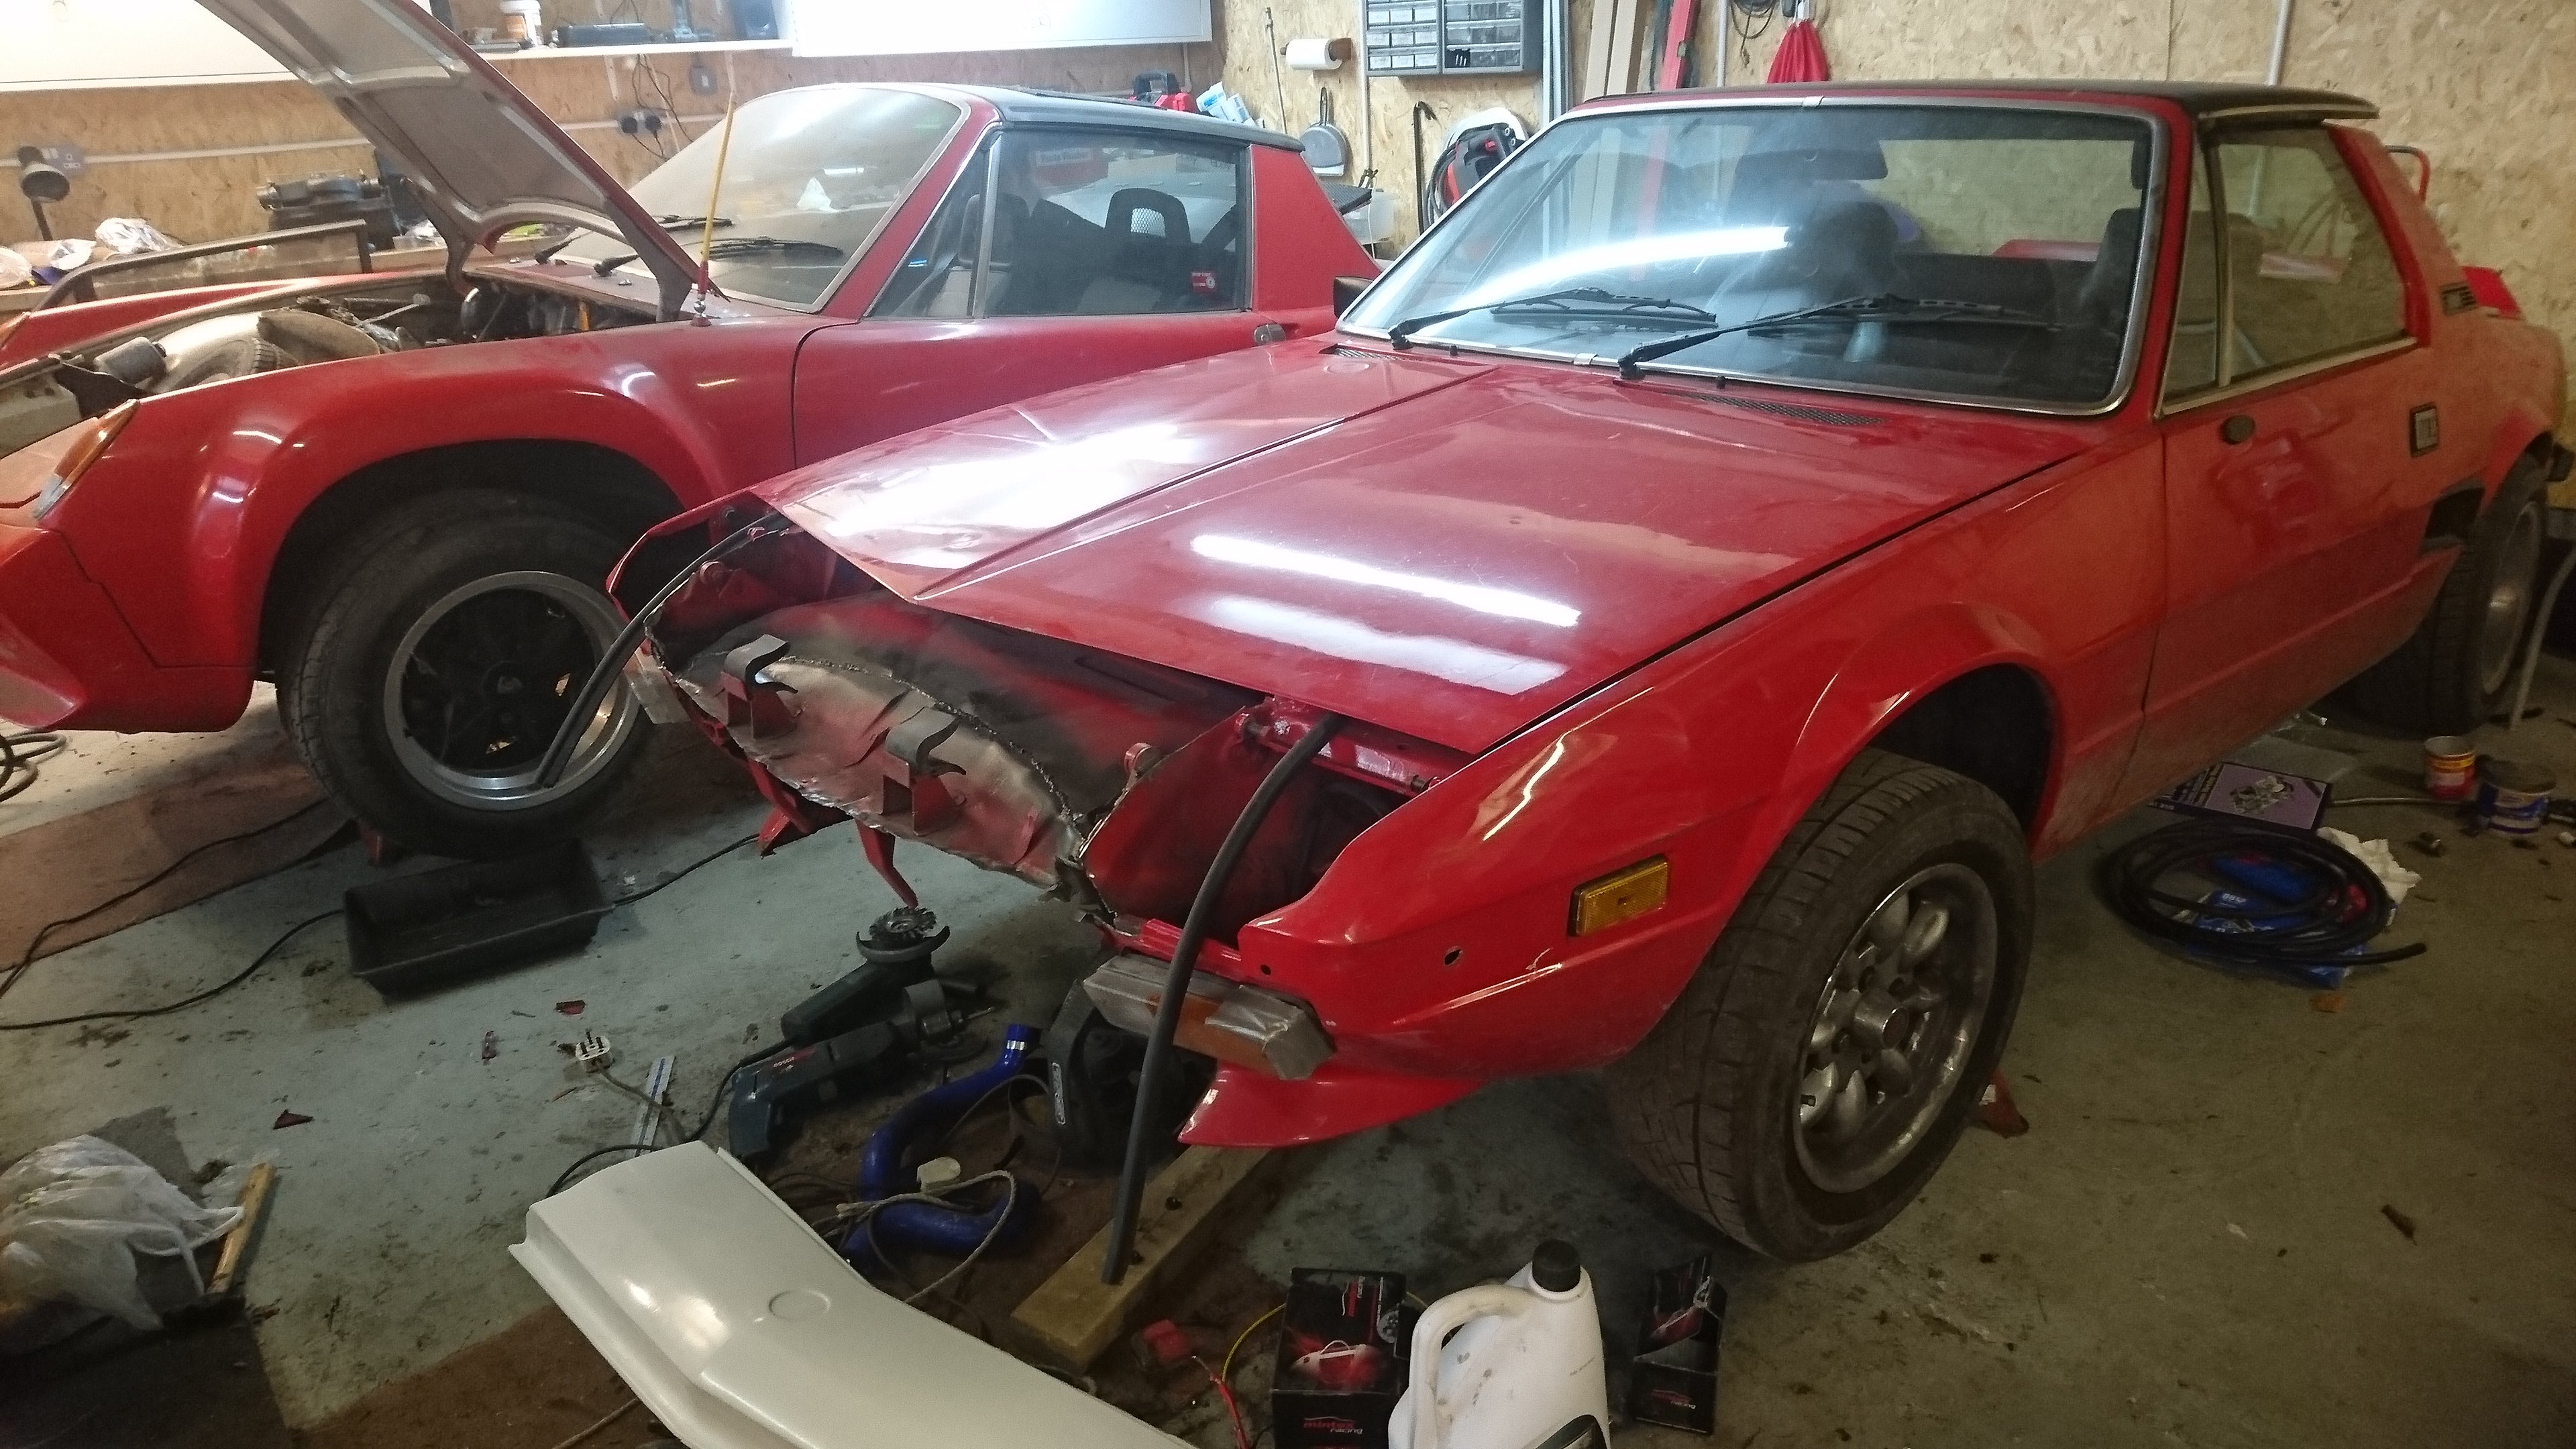
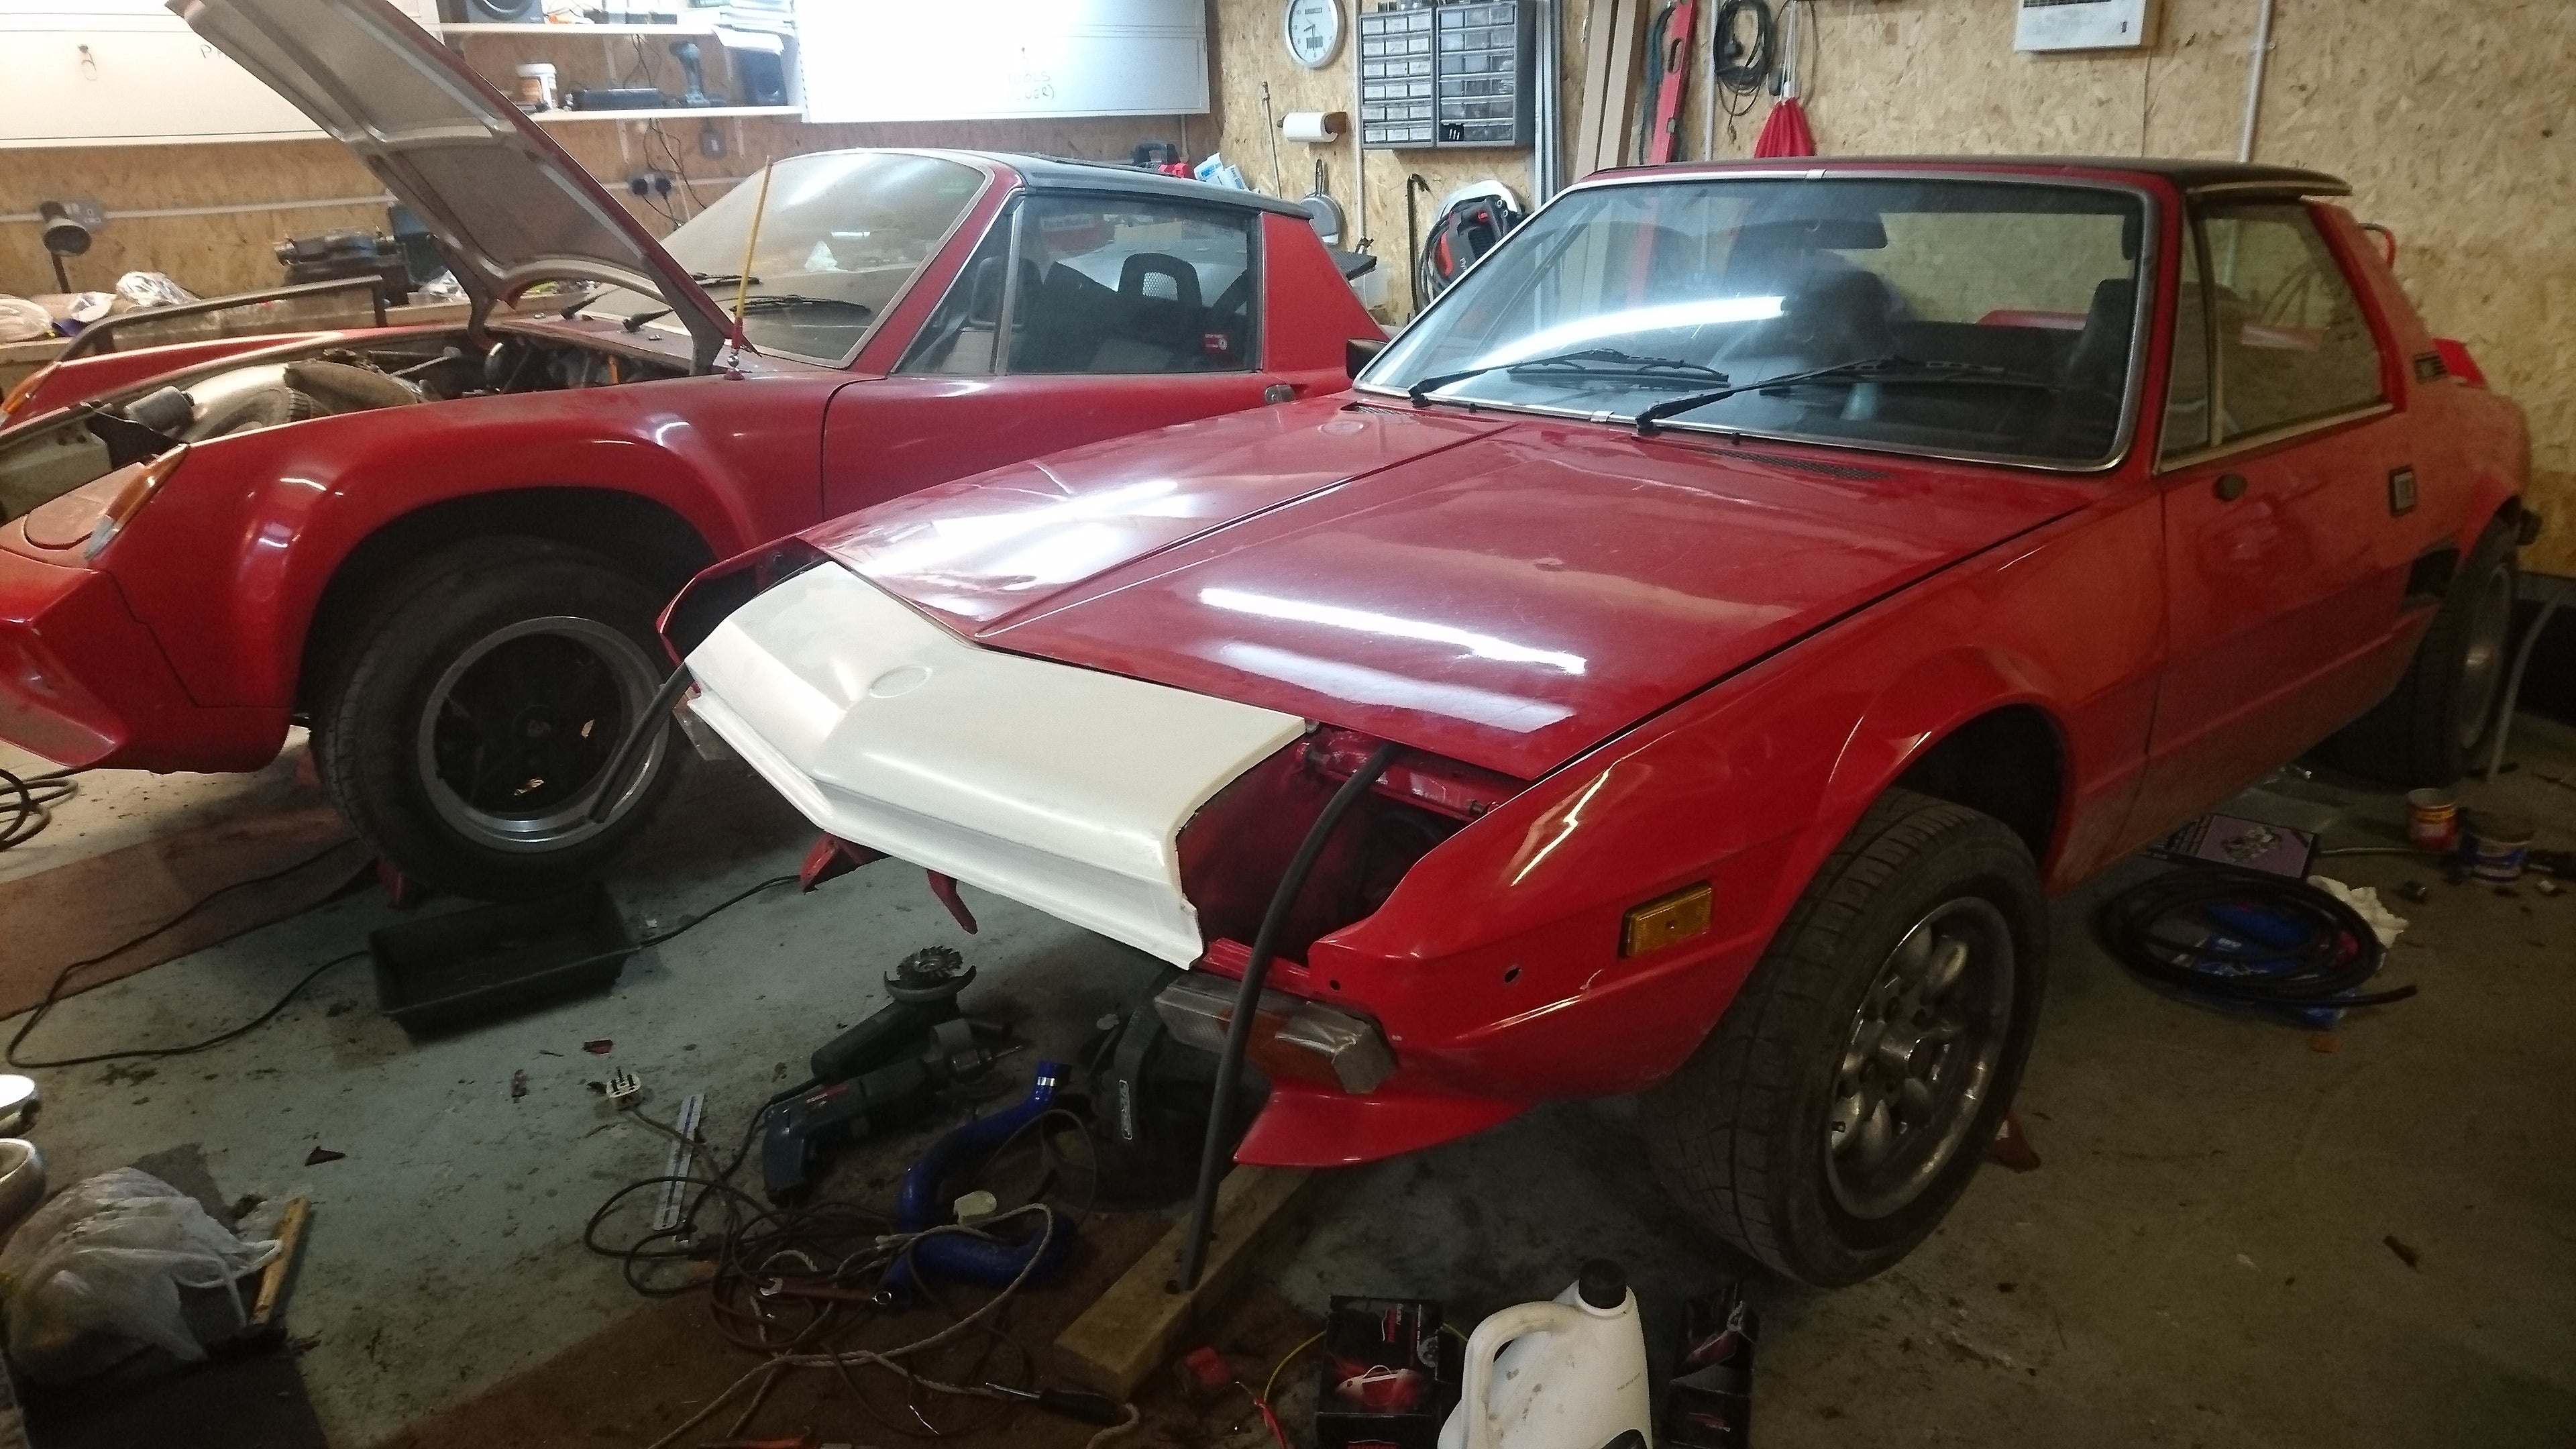
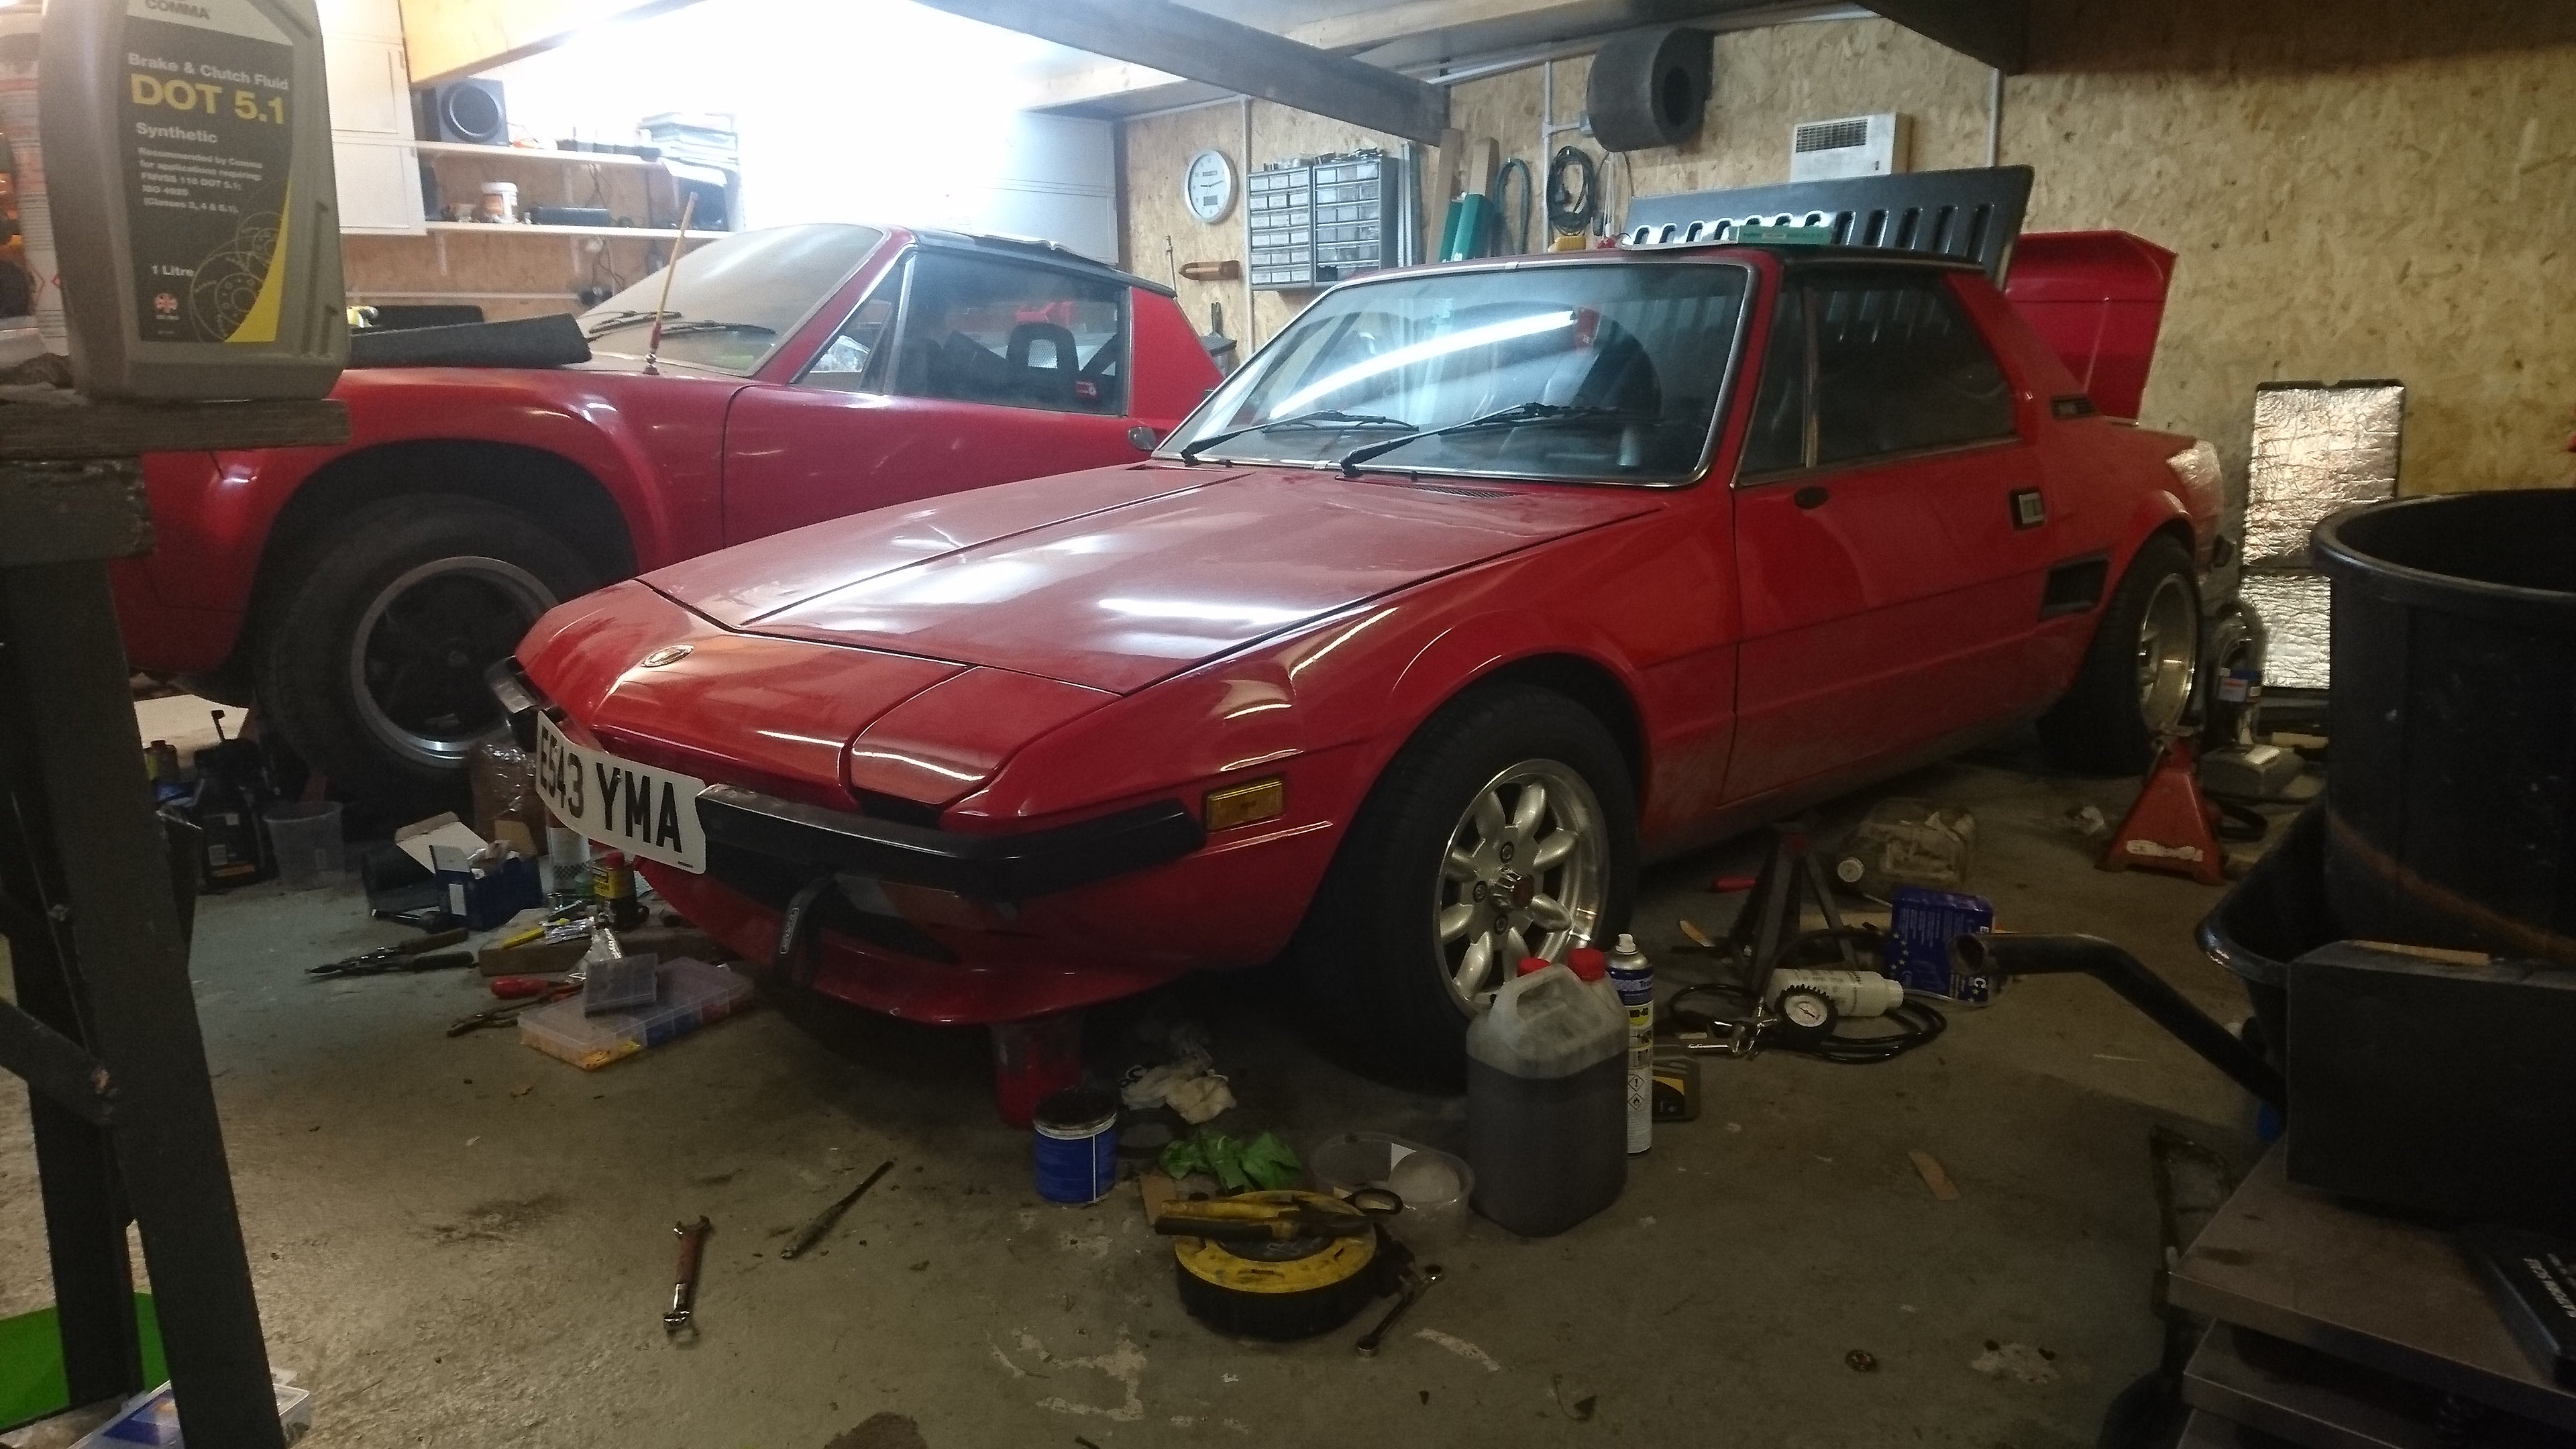
And this is how she stands now!
She would be ready for MoT if the horn hadn’t inexplicably stopped working. Wouldn’t be that irritating if we hadn’t already fixed it once before.
Still a couple of bits and pieces to fix (tappy valves, bigger rear calipers from a Lancia Montecarlo to balance the brakes better, and a weakly charging alternator), but nothing I can’t do as I’m driving :)
So yeah. Nearly there! I can’t wait :)
 Goggles Pizzano
> BiTurbo228 - Dr Frankenstein of Spitfires
Goggles Pizzano
> BiTurbo228 - Dr Frankenstein of Spitfires
08/24/2018 at 12:29 |
|
Great work and
write-up T
ony
.
 facw
> BiTurbo228 - Dr Frankenstein of Spitfires
facw
> BiTurbo228 - Dr Frankenstein of Spitfires
08/24/2018 at 12:32 |
|
Seems like a lot of work, but I’m glad to see you got everything (or almost everything) sorted out. The X1/9 is such a cool car though. There was a silver one on C raigslist for months when I was in Houston, and I’m always a bit disappointed that I didn’t buy it.
 CalzoneGolem
> BiTurbo228 - Dr Frankenstein of Spitfires
CalzoneGolem
> BiTurbo228 - Dr Frankenstein of Spitfires
08/24/2018 at 12:37 |
|
I love your tenacious reuse of parts.
 haveacarortwoorthree2
> BiTurbo228 - Dr Frankenstein of Spitfires
haveacarortwoorthree2
> BiTurbo228 - Dr Frankenstein of Spitfires
08/24/2018 at 12:38 |
|
Impressive (the fixing part, not the driving through the hedge part)!
|
BiTurbo228 - Dr Frankenstein of Spitfires
> facw
08/24/2018 at 12:39 |
|
Yeah they’re awesome cars :) I’d definitely recommend one. Not exactly quick in standard form, but so light and communicative they make up for it. Plenty you can do to tweak the speed a bit too ;)
And yeah about half the stuff I fixed was my own doing, and the rest is stuff that needed doing anyway so good all round :)
|
BiTurbo228 - Dr Frankenstein of Spitfires
> Goggles Pizzano
08/24/2018 at 12:39 |
|
Thanks ;) Tony's had some practice...
 BoxerFanatic, troublesome iconoclast.
> BiTurbo228 - Dr Frankenstein of Spitfires
BoxerFanatic, troublesome iconoclast.
> BiTurbo228 - Dr Frankenstein of Spitfires
08/24/2018 at 12:42 |
|
Very interesting read, I didn’t catch your Welsh adventure earlier, I may have to go find that.
Glad to see the car back in working order.
God save the affordable mid-engined cars! or at least people should! nice work on yours!
|
Goggles Pizzano
> BiTurbo228 - Dr Frankenstein of Spitfires
08/24/2018 at 12:44 |
|
Tony lives for this stuff. :-)x
|
BiTurbo228 - Dr Frankenstein of Spitfires
> CalzoneGolem
08/24/2018 at 12:45 |
|
A lot of it is driven by parts availability. It’s pretty damn good for such a low-value car to be honest (thank parts-sharing with a whole host of FWD Fiats for that), but a lot of the dedicated stuff like struts is pretty hard to come by affordably.
I’m just happy I could get a nosecone. That would have killed it stone dead for a while if I c ouldn’t get one.
|
BiTurbo228 - Dr Frankenstein of Spitfires
> haveacarortwoorthree2
08/24/2018 at 12:45 |
|
Thanks man :) the hedge bit was pretty impressive from where I was sitting, but for wholly different reasons ;)
|
BiTurbo228 - Dr Frankenstein of Spitfires
> BoxerFanatic, troublesome iconoclast.
08/24/2018 at 12:53 |
|
Definitely go check it out :) it’s a proper adventure! Link’s up top.
And yeah affordable mid-engined sportscars are real gems. There's not really a dud among them. It's a shame they're not really viable anymore given how simple the premise is. 'Take a FWD subframe and stick it in the back, take the same subframe and stick it at the front. Job done.'
 LOREM IPSUM
> BiTurbo228 - Dr Frankenstein of Spitfires
LOREM IPSUM
> BiTurbo228 - Dr Frankenstein of Spitfires
08/24/2018 at 13:22 |
|
That’s not what they meant when they sang “push-push, in the bush”
Good to see she's feeling the love though.
 Derpwagon
> BiTurbo228 - Dr Frankenstein of Spitfires
Derpwagon
> BiTurbo228 - Dr Frankenstein of Spitfires
08/24/2018 at 16:18 |
|
awesome work!
 RallyDarkstrike - Fan of 2-cyl FIATs, Eastern Bloc & Kei cars
> BiTurbo228 - Dr Frankenstein of Spitfires
RallyDarkstrike - Fan of 2-cyl FIATs, Eastern Bloc & Kei cars
> BiTurbo228 - Dr Frankenstein of Spitfires
08/24/2018 at 17:32 |
|
Very nice write-up and excellent work doing some good repairs to get her back in order! Looks almost as it did before the accident!
As you split the nosecone to make it fit, I assume you had to go through the pain of re-fiberglassing over the split and the like? I’m told laying fiberglass can be a PITA...
|
BiTurbo228 - Dr Frankenstein of Spitfires
> RallyDarkstrike - Fan of 2-cyl FIATs, Eastern Bloc & Kei cars
08/25/2018 at 05:11 |
|
Thanks! Yeah nearly there. Annoyingly the paint match on the nosecone isn’t great so I’ll have to redo that at some point, but it’s close enough that only I really notice it.
Fibreglassing’s actually pretty simple. Messy, but straight forwards. Where I’d cut it I fibreglassed the underneath back together to give it some strength and then used filler to smooth off the gaps at the top. There’s sometimes issues with warping as it dries though. F ibreglass contracts slightly as it cures so it can pull stuff in funny shapes sometimes (which is why FG replacement panels never really fit properly without fettling). This wasn’t too bad though :)
|
RallyDarkstrike - Fan of 2-cyl FIATs, Eastern Bloc & Kei cars
> BiTurbo228 - Dr Frankenstein of Spitfires
08/25/2018 at 07:11 |
|
Ah, doesn’t sound as bad as I thought, though I knew the messy part....didn’t know it warped so much though! Kudos on the hard work so far!
|
BiTurbo228 - Dr Frankenstein of Spitfires
> RallyDarkstrike - Fan of 2-cyl FIATs, Eastern Bloc & Kei cars
08/25/2018 at 07:21 |
|
Yeah I can imagine trying to get a smooth finish with FG is a pain, but that’s what filler’s for :)
The warping’s not so bad, but does affect big thin panels like wings and the like.
Nearly there! Sticking a button for the horn in today then it's good for MoT :)
|
RallyDarkstrike - Fan of 2-cyl FIATs, Eastern Bloc & Kei cars
> BiTurbo228 - Dr Frankenstein of Spitfires
08/25/2018 at 08:27 |
|
Keep us apprised! :D
 MM54
> BiTurbo228 - Dr Frankenstein of Spitfires
MM54
> BiTurbo228 - Dr Frankenstein of Spitfires
08/27/2018 at 18:43 |
|
Nicely done!